


Traveling has always come with its fair share of challenges, and staying connected while abroad was always a major hurdle for me. After years of dealing with SIM cards, phone providers, and the stress of setting up data plans in new countries, I finally switched to eSIM technology—and let me tell you, it’s a total game-changer.
For those unfamiliar with eSIMs, these are virtual SIM cards that offer the same functionality as traditional physical SIM cards, but without the hassle of physically swapping cards. I had heard about eSIMs for a while, but it wasn’t until recently that I decided to give it a go. Now that I’ve experienced the convenience firsthand, I can confidently say that the days of battling with old SIM cards are behind me.
Here’s a breakdown of what eSIMs are, how to use them for travel, and why I now swear by them for all my trips abroad.
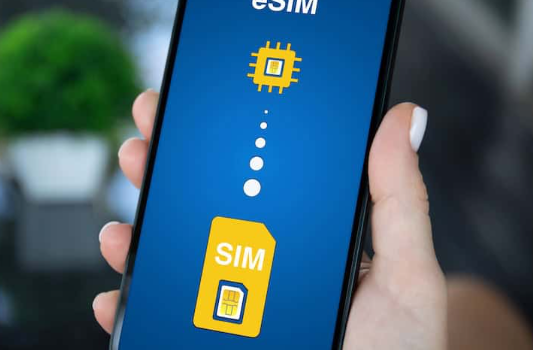
What Exactly is an eSIM?
In simple terms, an eSIM (embedded SIM) is a digital version of the physical SIM card that your phone uses to connect to a mobile network. Instead of physically swapping out SIM cards when you travel, eSIMs let you activate a new plan online and add it to your phone’s settings.
The best part? You can keep your existing phone number active while adding a local or international plan to stay connected without any hassle.
How to Use an eSIM for Travel
Using an eSIM for travel is as easy as online shopping. Here’s a step-by-step guide to how I’ve used it on my recent trips:
Step 1: Choose Your eSIM Plan
The first step is to pick the right eSIM plan. There are many providers offering different data plans, so you’ll want to shop around to find the best deal for your destination. Consider factors like data needs, coverage, and the countries where the eSIM provider operates. For example, I’ve used Saily eSIM, which has been easy to navigate and affordable, but there are many great options available like Airalo, Holafly, and Gigsky.
Step 2: Purchase the eSIM
Once you’ve chosen the right plan, purchasing the eSIM is simple. You’ll typically enter your payment details, and within minutes, you’ll receive a confirmation email with instructions for setting up the eSIM on your phone. It’s a straightforward process, and you’ll need to confirm that your phone is compatible with eSIM before purchasing.
Step 3: Set Up the eSIM on Your Phone
This is where the magic happens. After receiving your confirmation email, follow the instructions provided by the eSIM provider to install the eSIM. Some services use apps, while others provide a QR code for easy installation. The beauty of this process is that you don’t need to remove your current SIM card, meaning you can easily switch between your regular plan and your eSIM when you arrive at your destination.
Step 4: Update Your Settings
Before you leave for your trip, make sure your phone settings are ready. In the case of an iPhone, for instance, you’ll add the eSIM under the “Mobile Data” settings. It’s a quick process, and you can load both your regular SIM and your eSIM at the same time.
Step 5: Activate the eSIM at Your Destination
Once you arrive at your destination, simply activate the eSIM by switching off your primary SIM card in your phone settings. Then, turn on the eSIM, enable mobile data, and you’re good to go! You’ll have access to internet services without the need for buying expensive local SIM cards or dealing with language barriers.
Why eSIM is the Best Choice for Travel
For me, eSIMs have made staying connected abroad easier and more affordable. Traditionally, setting up a phone plan when traveling meant dealing with hidden charges, long waits in stores, and sometimes complicated paperwork. With eSIMs, it’s all done online, and I can activate my plan as soon as I land in my destination.
Not only does this save me time, but it also prevents the stress of swapping SIM cards, especially if I’m in a hurry to get online as soon as I arrive. With an eSIM, I’ve cut out all those middlemen, and I can be sure my data plan will work from the moment I step off the plane.
Is eSIM Worth It for Travelers?
In short, yes. eSIM technology has streamlined the whole process of staying connected abroad. I can now easily manage multiple plans, whether it’s a local plan for a few weeks or a global data plan for longer trips. As someone who travels often, the convenience of an eSIM cannot be overstated.
Even if you’re not very tech-savvy, setting up an eSIM is straightforward. I’m not exactly a tech expert myself, but I had no trouble at all getting my eSIM set up and running. If I can do it, so can you!
Which eSIM Provider Should You Choose?
While there are many providers to choose from, I recommend Saily for its simplicity and affordability. The app is user-friendly, and I’ve had a seamless experience with their service. However, other popular providers like Airalo and Holafly also offer great coverage and reliable plans. Be sure to read reviews and check if the provider supports your destination before purchasing.
Can You Get an International Phone Number with an eSIM?
Yes, most eSIM providers offer plans that include a local or international phone number. However, I typically don’t need an international phone number because I prefer to use apps like WhatsApp, Facebook Messenger, or Instagram Messenger to stay in touch with people while traveling. That said, if you need a phone number for calls or texting, you can easily get one through most eSIM services.
Final Thoughts
eSIMs have truly revolutionized how I stay connected abroad. With no physical SIM card to swap out, no expensive roaming charges, and the convenience of managing everything from my phone, I can’t recommend eSIMs enough. It’s an easy, affordable, and reliable way to stay connected, and I can’t imagine traveling without one now.