


When it comes to combining backpacking with photography, finding the right balance between the gear you need and the weight you’re willing to carry can be tricky. As an outdoor photographer who enjoys hiking in remote locations, I’ve had to figure out the best ways to pack my camera gear while keeping it safe and accessible. From long lenses to tiny tripods, here’s a breakdown of how I prepare for a backpacking trip and my recommendations for carrying camera gear in the wild.
Choosing the Right Gear for Backpacking
The first step in packing your camera gear is understanding the purpose of your trip. If you’re heading out to shoot the stars, astrophotography will require specific equipment. For this, I always carry a wide-angle lens (f/1.8 or faster) and a sturdy tripod, especially when I know the skies will be clear. On the other hand, during my thru-hike on the Colorado Trail, I found myself sending my camera gear back to town due to unpredictable weather and the priority of completing the hike. In that case, I opted to use my phone for photos, as making miles was more important than capturing perfect shots.
For most of my trips, I tend to stick with my full-frame mirrorless camera paired with a versatile zoom lens. Additionally, I always bring my phone for quick shots and convenience, and depending on the trip’s length, I might add a tripod, extra batteries, or filters.
What If I Don’t Have Camera Gear Yet?
If you’re new to outdoor photography and wondering where to start, here are a few things to consider. If you’re passionate about astrophotography or plan to print large-scale images, investing in a full-frame camera and a fast lens will be necessary. For general photography or beginner trips, a full-frame camera isn’t a must, but a camera with dual memory card slots might give you extra peace of mind on important trips.
For lenses, I recommend starting with a medium-range zoom like a 24-70mm or 24-105mm for its flexibility. If you prefer wide-angle shots, a 16-35mm lens will also serve you well. Interchangeable lenses can elevate your photography, but if you’re just starting, you don’t need to go overboard.
My Top Beginner Camera Pick for Backpacking
When it comes to camera choices, I recommend a lightweight full-frame mirrorless camera if you’re serious about your outdoor photography. It’s versatile, compact, and will deliver high-quality shots without adding too much bulk to your pack.
How to Carry Your Camera Gear While Hiking
Backpacking is all about being outdoors and exposed to the elements. From dirt to rain to wind, your camera gear can face serious wear and tear. I’ve learned this the hard way, such as when my camera fell over in Patagonia due to high winds, causing a hefty repair bill. The reality is, if you’re carrying professional camera gear, it’s bound to get banged up, especially when navigating rough trails or scrambling over rocks. But fear not, there are several methods to keep your gear protected while on the move.
1. Hyperlite Mountain Gear Camera Pod
The Hyperlite Camera Pod is a lightweight, padded case that securely holds your camera and lens. Available in different sizes, the large version fits my Sony a7RIII with a 24-105mm lens comfortably. The pod does a great job of keeping my camera dry in rain and protected during scrambles, although it won’t guarantee complete protection against drops or extreme conditions. It attaches easily to your backpack, but I did find it a bit cumbersome on my chest, especially when hiking on technical trails. However, a little DIY modification with cordage made it more comfortable by hanging it lower.
2. Peak Design Capture Clip
A popular choice among outdoor photographers, the Peak Design Capture Clip allows you to attach your camera directly to your backpack’s strap. It’s perfect for quick access, but it lacks weather protection, so you’ll need an additional rain cover to keep your gear safe from moisture. I prefer using the clip on my shoulder strap rather than my hip belt to avoid discomfort and a lopsided weight distribution. However, moving it between different backpacks can be a hassle, and it can cause shoulder strain on longer hikes.
3. Fanny Pack
For me, a fanny pack is the most comfortable and practical solution for carrying my camera. It sits on my hip and distributes the weight evenly, so I don’t experience shoulder or neck pain. While it’s easy to access, the downside is that it offers less protection from the elements compared to other options. The fanny pack also has less padding, which isn’t ideal for protecting a heavy camera. Still, it allows me to keep my hands free and doesn’t interfere with my other gear, like my GPS or phone.
Storing Drone and Accessories
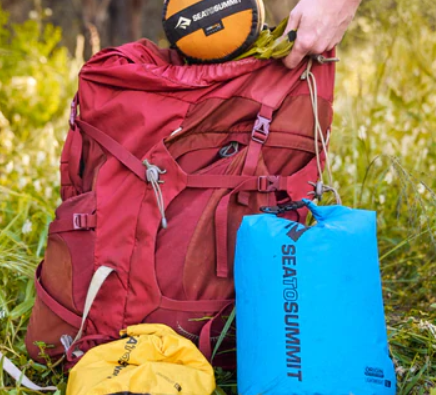
When it comes to drones, I haven’t yet taken mine backpacking due to wilderness restrictions, but if I were to, I’d store it in a waterproof dry sack, wrapped in my sleeping quilt for added protection. For accessories like cleaning kits and extra lenses, I keep them in a small dry sack or my pack’s waterproof liner to protect them from the elements.
Tripods are a little more tricky. Since they’re often bulky, I carry them in the side pocket of my backpack or strap them to the outside. For lightweight trips, a small, compact tripod can be a great option to minimize weight while still offering the stability needed for sharp, long-exposure shots.
Conclusion
Packing the right camera gear for a backpacking trip is about finding the balance between performance and practicality. Whether you’re a seasoned outdoor photographer or a beginner, you can still enjoy capturing breathtaking landscapes without overloading your pack. By choosing the right gear, using efficient carrying methods, and preparing for the elements, you can ensure that your camera is ready to snap those unforgettable moments in the wild.