


Nestled in the rugged northern part of Washington state, the North Cascades National Park offers some of the most stunning alpine landscapes in the country. Despite its beauty, this park is often overlooked, making it a quiet escape for those seeking solitude amidst jaw-dropping scenery. Stretching along the border into the Canadian Rockies, the park’s mountains and lakes are some of the most remote in the United States, contributing to its ranking as the fifth least-visited national park.
Although it doesn’t receive the massive crowds of other parks, North Cascades draws in those who love to explore the outdoors, especially mountaineers and hikers. In fact, over 27,000 visitors in 2019 were there for backcountry camping. If you’re not ready to summit towering peaks, though, the park also offers easily accessible trails with awe-inspiring views.
On a recent day trip from Seattle, I had the chance to hike to Blue Lake, followed by a leisurely drive along the Cascade Loop Byway, a scenic route that showcases some of Washington’s most incredible vistas.
Blue Lake Hike: A Hidden Gem
- Distance: 4.6 miles
- Elevation Gain: 1,050 feet
- Difficulty: Easy to Moderate
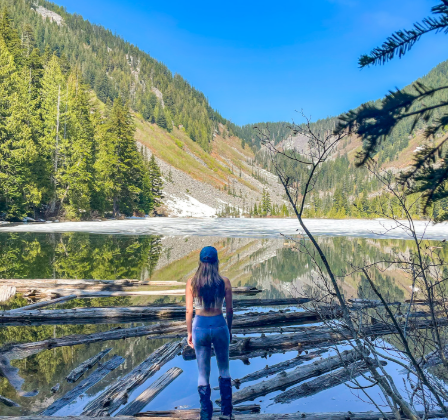
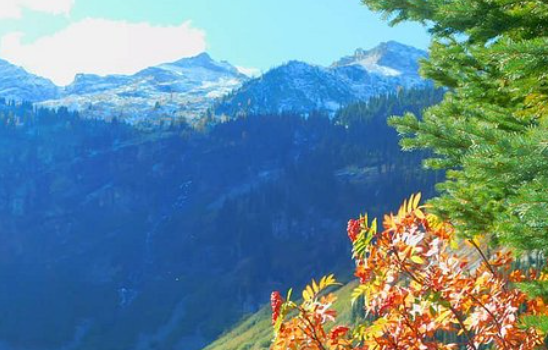
If you’re looking for a quick adventure with minimal effort but maximum reward, Blue Lake is the perfect choice. The trail is easily accessible and offers fantastic views throughout the hike, not just at the end. The first part of the trail is flat, following a boardwalk through a peaceful forest where you can still hear the occasional car, but the sounds fade as you venture deeper into nature.
After about a mile, the trail climbs gently through meadows with vibrant wildflowers and towering granite peaks. Before long, Blue Lake comes into view, with its clear water and surrounding snow-capped mountains. It’s an ideal spot to relax, whether you’re soaking in the beauty or dipping your feet into the cold water for a refreshing break. The area is often home to mountain goats, though I didn’t see any on my visit—but I did find some incredibly soft wool left behind on a branch. It was so tempting, I couldn’t resist a little touch!
On the way back, I found myself enjoying the descent even more than the climb. With the view now in front of me, I could take in the expansive mountain landscapes without straining up the trail. It made for an easy yet rewarding hike.
Other Notable Hikes Nearby
Huntoon Point (Easy)
This short and sweet trail is perfect for a nature stroll and is most popular when the snow melts. During winter, snowshoeing is a great alternative.
- Distance: 1.2 miles
- Elevation Gain: 200 feet
Maple Pass Loop (Moderate)
For a beautiful loop with panoramic views of the mountains and lakes, the Maple Pass Loop is a must. It’s a bit steeper if you go clockwise, but the scenery is worth it.
- Distance: 7.2 miles
- Elevation Gain: 2,000 feet
Sourdough Mountain (Strenuous)
A more challenging trail, this one offers incredible views and a true test of endurance. Expect many switchbacks as you climb, but the vistas at the summit make it all worthwhile.
- Distance: 10.2 miles
- Elevation Gain: 5,100 feet
Best Views in the North Cascades
If you’re driving through the North Cascades, you’re in for some spectacular views along the Cascade Loop, also known as the North Cascades Scenic Highway (or Highway 20). This scenic byway winds through some of the best vistas in the state, including stunning viewpoints like:
- Diablo Lake Viewpoint
This iconic viewpoint is easy to access and offers one of the most surreal views in the park. The lake, with its electric turquoise color, is set against rugged mountains, creating a scene that feels almost too perfect to be real. - Washington Pass Overlook
Located just a short distance from Blue Lake, this overlook provides up-close views of the surrounding peaks. The rocky paths leading to the overlook make it feel natural and untouched. Picnic tables are available, so it’s a perfect spot for a lunch with a side of mountains. - Birdsview Brewery
Not quite in the park but conveniently located along the Cascade Loop, this brewery is a great stop for a refreshing drink after a day of hiking. Enjoy a cold one while taking in views of the surrounding area.
Getting There
A car is essential to explore the North Cascades and its surrounding areas. From Seattle, the drive takes about 2.5 hours, though some trailheads are farther out. The drive itself is part of the fun, as you’ll pass through beautiful forests, along clear lakes, and by towering mountains that will have you stopping to take in the views more than once.
Some remote areas of the park, like Stehekin in the southeast corner, are only accessible by boat or plane, adding to their mystique.
When to Visit
The main area of the park is best visited between June and September, as most of the trails remain covered in snow until mid-July. August and September are the ideal months for hiking and camping, offering warmer temperatures and less snow.
- Average Summer Temperatures: 65° F – 75° F
For a different experience, Lake Chelan, located to the east, offers a drier, warmer climate and is a popular spot year-round.
Fun Facts
- North Cascades has the most glaciers in the U.S. outside of Alaska—over 300!
- In 1956, Jack Kerouac worked as a fire spotter at Desolation Peak.
- In 2018, photographer Scott Kranz completed a project summiting 50 peaks in a single year.
- The park covers 684,000 acres of pristine wilderness, including lakes, glaciers, mountains, and waterfalls.
The North Cascades is a park that offers something for everyone, from easy day hikes to challenging multi-day backpacking trips. Whether you’re in search of solitude, dramatic mountain views, or an unforgettable camping experience, this underrated gem should definitely be on your radar.