


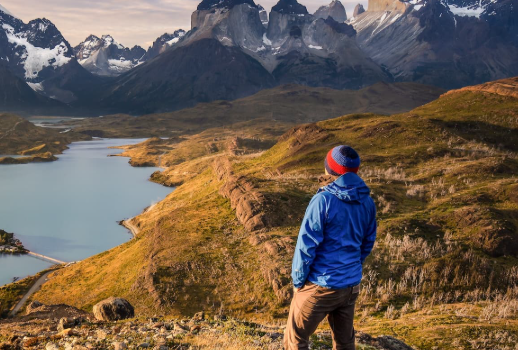
If you’re planning a trip to San Carlos de Bariloche, you’re in for an incredible adventure. Nestled in Argentina’s stunning Patagonia region, Bariloche is home to some of the most scenic and diverse hiking trails. Whether you’re into short hikes, all-day treks, or even a bit of cycling, the breathtaking landscapes of the Los Andes await you. Here’s a guide to some of the best hikes and outdoor activities in and around this charming mountain town.
1. Cerro Campanario
- Difficulty: Easy
- Distance: 1 km
- Time: 30-40 minutes
- How to Get There: Take bus number 20 from downtown Bariloche. The ride takes about 30 minutes.
The short but steep hike up Cerro Campanario rewards you with one of the most stunning views in Bariloche. From the summit, you’ll enjoy 360-degree panoramas of Lago Nahuel Huapi, the Perito Moreno Lake, and the surrounding snow-capped mountains. For those who prefer not to hike, the funicular offers an easy ride to the top. Afterward, relax with a cup of coffee at the mountaintop cafe.
2. Cerro Llao Llao
- Difficulty: Easy
- Distance: 7-8 km loop
- Time: 4-5 hours
- How to Get There: Take bus number 20 towards Puerto Pañuelo and get off near the Llao Llao Hotel. From here, walk for about 30 minutes to the trailhead.
Cerro Llao Llao offers a scenic hike with views of the nearby lakes, including Lago Escondido. This loop trail takes you through lush forests and along pristine shorelines. Stop by Playa Villa Tacul for a relaxing break or have a picnic at one of the lake’s serene spots. The summit offers a fantastic viewpoint, perfect for appreciating the sparkling blue lakes below.
3. Cycling the Chico Circuit
- Difficulty: Moderate
- Distance: 24 km loop
- Time: 4-5 hours
- How to Get There: Head towards Cerro Campanario and get off at km18.6. Rent a bike from one of the local shops, like Cordillera Bike Rental.
The Chico Circuit is a great way to explore Bariloche if you enjoy cycling. The loop offers plenty of chances to stop and take in the stunning views of the lakes and mountains. While some hills are steep, the journey is manageable, and the stops along the way—like Patagonia Brewery—make it all worthwhile.
4. Refugio Frey and Laguna Schmoll
- Difficulty: Moderate/Hard
- Distance: 10 km to Refugio Frey + 2 km to Laguna Schmoll
- Time: 4 hours
- How to Get There: Take bus number 55 to the ski center car park, where the trail begins.
For those seeking a more challenging trek, the hike to Refugio Frey is an unforgettable adventure. The trail winds through forests and alongside mountain lakes. If you’re up for an even tougher challenge, continue to Laguna Schmoll—one of the most stunning hidden gems in the area. This part of the hike is steep and requires some navigating, but the views are absolutely worth it.
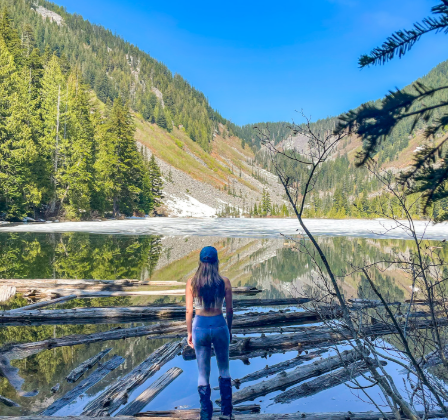
5. Lago Gutiérrez
- Difficulty: Easy
- Distance: 3 km
- Time: 1 hour
- How to Get There: Take bus number 50 to the end, just after the bridge.
This short and easy trail is perfect for families or those looking for a quick escape into nature. The views over the emerald waters of Lago Gutiérrez are serene, and you can take a break at Cascada de Los Duendes, a beautiful waterfall along the way.
Additional Tips for Hiking in Bariloche
- Getting Around: Use the Sube Card for buses in Bariloche, just like in Buenos Aires. These can be topped up at local kiosks.
- Weather Considerations: Bariloche weather can be unpredictable, so pack for all conditions, especially if you’re hiking to higher altitudes.
- Chocolate Lovers: Bariloche is famous for its chocolate. Be sure to try the local shops and grab some sweet treats after your hikes!
How to Reach Bariloche
- From Buenos Aires: Flights are frequent and can be as affordable as $50 USD. For a longer, scenic journey, take the bus to Bariloche.
- From El Chaltén: Be prepared for a 24-hour bus ride. Flights from El Calafate are also available for a faster, albeit more expensive, option.
Where to Stay in Bariloche
- Bonita Lake House: This cozy spot near Cerro Campanario offers stunning views and easy access to some of the best hiking in the area.
- Hospedaje Penthouse: Perfect for those visiting during peak seasons like Christmas, with festive dinners and a friendly atmosphere.
- Hotel Kawa Mountain Retreat: A serene, upscale retreat with panoramic views, offering peace and relaxation in nature.
Bariloche, with its rich natural beauty, diverse hiking trails, and charming town atmosphere, is a must-visit destination for nature lovers and adventure seekers alike. Whether you’re trekking through dense forests or cycling around the picturesque lakes, this Patagonia gem has something for every outdoor enthusiast.