Starting January 8, 2025, travellers from visa-exempt countries, including Malaysians, will need to obtain an Electronic Travel Authorisation (ETA) to visit the United Kingdom. This digital travel document is part of the UK’s initiative to enhance border security while streamlining the entry process for visitors. Here’s a comprehensive guide to help you navigate the new system and ensure a smooth trip.

What Is the UK ETA?

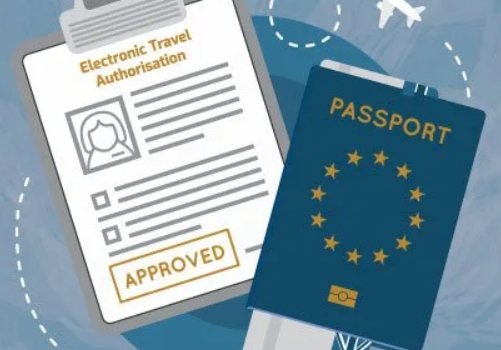
The UK Electronic Travel Authorisation (ETA) is a digital visa waiver that allows eligible visitors to travel to the UK for short-term stays such as tourism, business, or transit. Similar to other systems like the US ESTA or Australia’s eVisitor program, the ETA will be required for those visiting the UK from visa-exempt countries. It is not a substitute for traditional visas for longer stays or work permits.

Key Details of the ETA

  • Cost: The ETA will cost £10 (approximately RM56.70). This affordable fee helps fund the digital system’s development.
  • Validity: The ETA is valid for up to two years or until your passport expires, whichever comes first. It permits multiple entries, with each stay not exceeding six months.
  • Application Process: The ETA application process for Malaysian travellers opens on November 27, 2024. You can apply via the UK government website or the official UK ETA mobile app. It requires basic personal information, travel plans, and payment. Processing is typically fast, but applying well in advance is recommended.

Why Is the ETA Being Introduced?

The UK’s introduction of the ETA aims to modernise its border controls and align with international standards. The goals include:

  • Pre-screening travellers: Vetting travellers before they arrive helps minimise security risks.
  • Streamlining entry: The digital system speeds up entry processing at airports and other ports of entry.
  • Adapting to global trends: The ETA aligns with similar systems like the EU’s upcoming ETIAS, creating a consistent experience for travellers across major destinations.

Who Needs the ETA?

The ETA is required for travellers from visa-exempt countries visiting the UK for:

  • Tourism: Sightseeing, cultural experiences, or leisure activities.
  • Business: Attending meetings, conferences, or trade events.
  • Short-term study: Courses lasting six months or less.
  • Transit: Passing through the UK en route to another destination.

Children and dependents will also need their own ETA. However, if you already hold a valid visa or residence permit for the UK, you do not need to apply for an ETA.

How to Apply for the ETA

Applying for the ETA is a straightforward, digital process:

  1. Visit the official website or download the UK ETA app.
  2. Create an account using a valid email address.
  3. Fill out the application form, including personal details, passport information, travel dates, and reason for visiting.
  4. Pay the fee using a credit or debit card.
  5. Receive approval: Once approved, your ETA is electronically linked to your passport, and there’s no need for a physical document.

Approval is typically granted within 72 hours, but it’s best to apply at least a week in advance to account for potential delays.

Benefits of the ETA

  • Simplified travel: The digital process eliminates the need for in-person visa appointments.
  • Enhanced security: The pre-travel vetting process ensures that potential risks are addressed before you arrive.
  • Ease of use: The simple application process makes it accessible for all travellers, regardless of their tech skills.
  • Affordability: At £10, the ETA is more cost-effective than similar systems like the US ESTA, which costs $21 (about RM100).

Practical Tips for Malaysian Travellers

  1. Apply early: Submit your application as soon as the system opens to avoid last-minute issues.
  2. Check your passport: Ensure your passport is valid for at least six months beyond your planned travel date.
  3. Keep confirmation details: While the ETA is linked to your passport, having a copy of the approval email can offer peace of mind.
  4. Stay informed: The UK government may announce updates, so it’s important to monitor official sources.

Exploring the UK with Your ETA

Once you have your ETA, the UK is ready for you to explore. From the historic sights of London, including Buckingham Palace and the Tower of London, to the breathtaking beauty of the Scottish Highlands, there’s something for everyone. Popular destinations include:

  • London: The capital’s iconic landmarks and cultural experiences.
  • Edinburgh: A city steeped in history, famous for its castle and festivals.
  • Lake District: A serene retreat for nature lovers with scenic lakes and hiking trails.
  • Bath: Known for its ancient Roman baths and Georgian architecture.

FAQs

1. Do children need an ETA?
Yes, every traveller, including children, requires their own ETA.

2. What happens if my application is rejected?
You may need to provide additional information or consult UK immigration services for assistance.

3. Can I update my ETA after approval?
If your travel plans change, you may need to apply for a new ETA, as the document is linked to specific details of your trip.

4. Is the ETA refundable?
No, the £10 fee is non-refundable, even if your application is denied.

Conclusion

The UK’s Electronic Travel Authorisation (ETA) marks an exciting step in modernising the travel process. While it introduces an additional step for Malaysian travellers, the ETA is affordable, easy to apply for, and ensures greater security. By applying early and staying informed, you can ensure a smooth journey to the UK in 2025 and beyond.

Before our John Muir Trail adventure, I had been using a second-hand backpack for shorter trips. While it did the job for weekend hikes, I knew I needed something better for a long trek. That’s when I turned to Brady, who is the gear expert, for advice. Thanks to his recommendations and research, I decided to invest in the Gossamer Gear Mariposa 60. Though I only had it for about a month before our trip, it quickly became clear why this backpack is such a favorite among outdoor enthusiasts.

Tech Specs

Here are the details of the Mariposa 60:

  • Capacity: 60 liters (supports up to 35 lbs.)
  • Weight: 32.7 oz.
  • Materials: Durable 100D and 200D Robic nylon, Darlington mesh, foam
  • Frame/Suspension: Removable internal aluminum frame
  • Pockets: 7
  • Made in: Mexico
  • Price: $225 (backpack only), $270 with hip belt

The pack comes in three sizes:

  • Small: 17.25” (torso length 11.5”-15.5”)
  • Medium: 20.25” (torso length 15.5”-19.5”)
  • Large: 23.25” (torso length 19.5”-23.5”)

Hip belts are sold separately in three sizes:

  • Small: 24”-34” waist
  • Medium: 30”-40” waist
  • Large: 38”-50” waist

I really appreciate the customizable fit that comes with separate hip belt sizes, offering a better fit than many other packs. The removable hip belt also doesn’t compromise load transfer, which can be a concern with some packs.

Key Features

The Gossamer Gear Mariposa 60 is a lightweight pack, yet it’s packed with features:

  • Main Compartment: Large with fold-over closure (called “Over-the-top” by GG), secured with buckles
  • Side Pockets: One long side pocket and two shorter ones
  • Back Pocket: Large mesh pocket
  • Small Zippered Stash Pocket: On the fold-over piece
  • Hydration Sleeve and Port
  • Multiple Loops: For strapping additional gear
  • Removable Foam Back Panel: Doubles as a sit pad
  • Removable Hip Belt
  • Hip Belt Pockets: On the smaller side
  • D-Rings for Trekking Poles
  • Ice Axe Loop

Layout

The layout of the Mariposa 60 is simple but highly functional. The large main compartment features a fold-over closure that uses buckles to provide vertical compression, ensuring your gear stays tight and compact. However, it lacks horizontal compression, which could have been helpful for a 60-liter pack, though it’s not a dealbreaker.

The side pockets are a unique feature of this pack. One side has a long pocket that runs about ¾ of the pack’s height, while the other side has two shorter pockets stacked on top of each other. The asymmetry may look unusual at first, but it’s actually quite practical. I used the short pockets for small items like snacks and sunscreen, and the long pocket was perfect for a water bottle. The mesh back pocket is great for drying wet items or storing items you want to access quickly, like a GoPro or rain jacket.

A downside, however, is the hip belt pockets. While they’re not tiny, they are on the small side, and the zipper only runs about two-thirds of the way across. This makes it a bit tricky to access your gear, which could be frustrating if you use your hip belt pockets often.

Suspension System

The Mariposa 60 features a lightweight internal aluminum frame, which is common in many ultralight packs. What sets it apart is how well this frame transfers the pack’s weight to the hip belt. The pack uses strong attachment points that securely connect the frame to the hip belt, ensuring excellent load transfer. It almost feels like you’re using a traditional full-frame pack, but with the added benefit of being much lighter.

The foam back panel provides extra comfort and prevents you from feeling the frame stays pressing into your back. While it can get a little sweaty, it’s a huge plus in terms of comfort. Plus, the back panel can be removed and used as a sit pad at camp, adding more versatility to this already feature-packed pack.

Pros

  • Comfort: This is, hands down, the most comfortable pack I’ve used. The shoulder straps and hip belt are well-padded, and the load is evenly distributed, making long treks feel much easier. Plus, the lightweight design keeps the weight off your back, which I truly appreciated during our hike.
  • Organization: The Mariposa 60 is great for organizing your gear. The mesh pockets are perfect for drying socks or stashing other essentials, and the numerous loops allow you to secure trekking poles, an ice axe, or extra gear with ease.

Cons

  • Durability: As much as I loved this pack, I did encounter an issue with its durability. Given that I’m hard on gear, I wasn’t too surprised when I found a significant tear in the bottom of the pack after our 16-day John Muir Trail hike. While Gossamer Gear does caution users about the fragility of ultralight gear, I had hoped the pack would hold up a bit better. Nonetheless, the pack is still functional and will continue to serve me well for future trips, despite the wear and tear.

Recommendation

The Gossamer Gear Mariposa 60 is an excellent investment for hikers who prioritize comfort and lightweight design. It’s ideal for thru-hikes, weekend getaways, and overnight trips. Just be mindful of its fragility, and treat it with care to extend its lifespan. For those looking for a pack that excels in comfort, organization, and versatility, the Mariposa 60 is hard to beat.

Nestled in the rugged northern part of Washington state, the North Cascades National Park offers some of the most stunning alpine landscapes in the country. Despite its beauty, this park is often overlooked, making it a quiet escape for those seeking solitude amidst jaw-dropping scenery. Stretching along the border into the Canadian Rockies, the park’s mountains and lakes are some of the most remote in the United States, contributing to its ranking as the fifth least-visited national park.

Although it doesn’t receive the massive crowds of other parks, North Cascades draws in those who love to explore the outdoors, especially mountaineers and hikers. In fact, over 27,000 visitors in 2019 were there for backcountry camping. If you’re not ready to summit towering peaks, though, the park also offers easily accessible trails with awe-inspiring views.

On a recent day trip from Seattle, I had the chance to hike to Blue Lake, followed by a leisurely drive along the Cascade Loop Byway, a scenic route that showcases some of Washington’s most incredible vistas.

Blue Lake Hike: A Hidden Gem

  • Distance: 4.6 miles
  • Elevation Gain: 1,050 feet
  • Difficulty: Easy to Moderate

If you’re looking for a quick adventure with minimal effort but maximum reward, Blue Lake is the perfect choice. The trail is easily accessible and offers fantastic views throughout the hike, not just at the end. The first part of the trail is flat, following a boardwalk through a peaceful forest where you can still hear the occasional car, but the sounds fade as you venture deeper into nature.

After about a mile, the trail climbs gently through meadows with vibrant wildflowers and towering granite peaks. Before long, Blue Lake comes into view, with its clear water and surrounding snow-capped mountains. It’s an ideal spot to relax, whether you’re soaking in the beauty or dipping your feet into the cold water for a refreshing break. The area is often home to mountain goats, though I didn’t see any on my visit—but I did find some incredibly soft wool left behind on a branch. It was so tempting, I couldn’t resist a little touch!

On the way back, I found myself enjoying the descent even more than the climb. With the view now in front of me, I could take in the expansive mountain landscapes without straining up the trail. It made for an easy yet rewarding hike.

Other Notable Hikes Nearby

Huntoon Point (Easy)
This short and sweet trail is perfect for a nature stroll and is most popular when the snow melts. During winter, snowshoeing is a great alternative.

  • Distance: 1.2 miles
  • Elevation Gain: 200 feet

Maple Pass Loop (Moderate)
For a beautiful loop with panoramic views of the mountains and lakes, the Maple Pass Loop is a must. It’s a bit steeper if you go clockwise, but the scenery is worth it.

  • Distance: 7.2 miles
  • Elevation Gain: 2,000 feet

Sourdough Mountain (Strenuous)
A more challenging trail, this one offers incredible views and a true test of endurance. Expect many switchbacks as you climb, but the vistas at the summit make it all worthwhile.

  • Distance: 10.2 miles
  • Elevation Gain: 5,100 feet

Best Views in the North Cascades

If you’re driving through the North Cascades, you’re in for some spectacular views along the Cascade Loop, also known as the North Cascades Scenic Highway (or Highway 20). This scenic byway winds through some of the best vistas in the state, including stunning viewpoints like:

  • Diablo Lake Viewpoint
    This iconic viewpoint is easy to access and offers one of the most surreal views in the park. The lake, with its electric turquoise color, is set against rugged mountains, creating a scene that feels almost too perfect to be real.
  • Washington Pass Overlook
    Located just a short distance from Blue Lake, this overlook provides up-close views of the surrounding peaks. The rocky paths leading to the overlook make it feel natural and untouched. Picnic tables are available, so it’s a perfect spot for a lunch with a side of mountains.
  • Birdsview Brewery
    Not quite in the park but conveniently located along the Cascade Loop, this brewery is a great stop for a refreshing drink after a day of hiking. Enjoy a cold one while taking in views of the surrounding area.

Getting There

A car is essential to explore the North Cascades and its surrounding areas. From Seattle, the drive takes about 2.5 hours, though some trailheads are farther out. The drive itself is part of the fun, as you’ll pass through beautiful forests, along clear lakes, and by towering mountains that will have you stopping to take in the views more than once.

Some remote areas of the park, like Stehekin in the southeast corner, are only accessible by boat or plane, adding to their mystique.

When to Visit

The main area of the park is best visited between June and September, as most of the trails remain covered in snow until mid-July. August and September are the ideal months for hiking and camping, offering warmer temperatures and less snow.

  • Average Summer Temperatures: 65° F – 75° F

For a different experience, Lake Chelan, located to the east, offers a drier, warmer climate and is a popular spot year-round.

Fun Facts

  1. North Cascades has the most glaciers in the U.S. outside of Alaska—over 300!
  2. In 1956, Jack Kerouac worked as a fire spotter at Desolation Peak.
  3. In 2018, photographer Scott Kranz completed a project summiting 50 peaks in a single year.
  4. The park covers 684,000 acres of pristine wilderness, including lakes, glaciers, mountains, and waterfalls.

The North Cascades is a park that offers something for everyone, from easy day hikes to challenging multi-day backpacking trips. Whether you’re in search of solitude, dramatic mountain views, or an unforgettable camping experience, this underrated gem should definitely be on your radar.

Looking for an exciting and unique way to explore the world with your family? A campervan adventure might be just what you need! With the freedom to go wherever you want, whenever you want, campervan travel is perfect for creating lasting memories as a family. From scenic coastlines to breathtaking mountain ranges, these 10 amazing campervan routes offer something for everyone.

Before diving into these incredible destinations, it’s essential to remember that planning and preparation are key to making your campervan trip a success. So grab your pens and start plotting your family’s next adventure!

To make your trip even more exciting, don’t forget to check out our Van Life Edition deck, which includes 50 unique challenges to add an extra twist to your journey, helping you experience your trip in a more immersive way.

1. Scotland’s North Coast 500

Scotland’s North Coast 500 is a must for any campervan enthusiast. This 500-mile loop through the rugged landscapes of northern Scotland offers spectacular views of dramatic cliffs, bustling harbors, and ancient mountains. Along the way, you’ll find charming villages, historic sites, and the famous John O’Groats signpost. Whether you’re hiking in the Highlands or enjoying the coastal scenery, this trip is an unforgettable adventure.

  • Route: A circular journey along Scotland’s northernmost coastline.
  • Recommended Campsites: Dunnet Bay Caravan Club Site, Ardmair Point Holiday Park.
  • Suggested Activities: Visit John O’Groats, hike in the Highlands, and explore Ullapool.

2. The Alps: Switzerland, France, and Italy

A campervan journey through the Alps offers one of the most scenic road trips in Europe. The towering peaks, picturesque villages, and alpine lakes create a breathtaking backdrop for your adventure. Whether you’re traveling through Switzerland, France, or Italy, you’ll be surrounded by natural beauty and a range of outdoor activities, from hiking to cable car rides to the top of Mont Blanc.

  • Route: A scenic drive through Switzerland, France, and Italy, featuring famous mountain passes.
  • Recommended Campsites: Camping Jungfrau (Switzerland), Les Deux Glaciers (France), Camping Arquin (Italy).
  • Suggested Activities: Ride the cable car to Mont Blanc, visit the Matterhorn, and enjoy alpine cuisine.

3. Hokkaido, Japan

For a unique campervan adventure, head to Hokkaido, Japan’s northernmost island. Known for its stunning natural beauty, Hokkaido offers tranquil lakes, dense forests, and volcanic hot springs. Explore Furano’s lavender fields, soak in Noboribetsu’s natural hot springs, and enjoy fresh seafood. With a campervan, you’ll have the freedom to explore at your own pace and enjoy the island’s peaceful beauty.

  • Route: A loop around Hokkaido, passing national parks and hot springs.
  • Recommended Campsites: Lake Shikotsu Campground, Furano Resort Orika.
  • Suggested Activities: Soak in hot springs, visit Biei’s Blue Pond, and sample fresh seafood.

4. The Australian Outback

The Australian Outback is perfect for a rugged campervan adventure. From the iconic Uluru to the natural beauty of Kings Canyon and Kakadu National Park, the Outback offers endless opportunities for exploration. Drive through vast deserts, camp under starry skies, and experience the stunning landscapes that make Australia’s interior so unique.

  • Route: A journey through the vast Australian Outback, with highlights like Uluru and Kings Canyon.
  • Recommended Campsites: Ayers Rock Campground, Alice Springs Tourist Park.
  • Suggested Activities: Visit Uluru, hike Kings Canyon, and stargaze in the desert.

5. The Canadian Rockies

The Canadian Rockies offer one of the most awe-inspiring campervan experiences. Drive along the Icefields Parkway, past turquoise lakes, glaciers, and towering peaks. Explore Banff and Jasper National Parks, where you can hike along crystal-clear lakes and spot wildlife. The Canadian Rockies will leave you refreshed and inspired, making it a perfect family adventure.

  • Route: A road trip through Banff and Jasper National Parks, featuring stunning mountain views.
  • Recommended Campsites: Two Jack Lakeside Campground, Wapiti Campground.
  • Suggested Activities: Hike Moraine Lake, soak in Banff’s hot springs, and spot wildlife in Jasper.

6. Baja California, Mexico

For a coastal campervan adventure, Baja California offers sandy beaches, rugged terrain, and vibrant culture. Drive along the peninsula and enjoy fresh seafood, visit remote towns, and set up camp on the beach. Baja is perfect for those looking for an adventure-packed road trip filled with both natural beauty and cultural experiences.

  • Route: A road trip through Baja California’s rugged coastline and fishing villages.
  • Recommended Campsites: Campo Cortez, Bahia de los Angeles, Rancho Buena Vista.
  • Suggested Activities: Swim with whale sharks, surf in Todos Santos, and enjoy local seafood in Ensenada.

7. Patagonia, Argentina and Chile

Patagonia is the ultimate destination for outdoor enthusiasts. This region, spanning the southern reaches of Argentina and Chile, is filled with dramatic glaciers, towering peaks, and breathtaking scenery. Whether you’re hiking through forests or kayaking past icebergs, Patagonia’s beauty is unmatched, making it a must-see for any campervan traveler.

  • Route: A road trip through Patagonia’s national parks and glaciers.
  • Recommended Campsites: Torres del Paine National Park, El Chalten Camping Municipal.
  • Suggested Activities: Hike to Mount Fitz Roy, visit the Perito Moreno Glacier, and spot penguins on the Valdes Peninsula.

8. Namibia’s Skeleton Coast

For an off-the-beaten-path adventure, Namibia’s Skeleton Coast offers a unique blend of dramatic landscapes and wildlife. Explore the desert, spot elephants and lions, and visit abandoned colonial towns. With a campervan, you can camp beneath the stars and experience the wild beauty of Namibia’s west coast.

  • Route: A journey along the Skeleton Coast, past shipwrecks and abandoned mines.
  • Recommended Campsites: Terrace Bay Resort, Skeleton Coast Camp, Cape Cross Lodge.
  • Suggested Activities: Visit Kolmanskop ghost town, sandboard in Swakopmund, and spot desert-adapted wildlife.

9. The Garden Route, South Africa

The Garden Route is one of the most scenic drives in South Africa, featuring lush forests, beautiful beaches, and charming towns. Explore Tsitsikamma National Park, go whale watching in Hermanus, and sample wine in the Cape Winelands. The Garden Route is perfect for a family campervan adventure, offering both relaxation and outdoor fun.

  • Route: A coastal drive along South Africa’s southern coast, with beaches and forests.
  • Recommended Campsites: Wilderness Ebb-and-Flow Rest Camp, Storms River Mouth Rest Camp.
  • Suggested Activities: Whale watching in Hermanus, hiking in Tsitsikamma, and wine tasting in the Cape Winelands.

10. Scotland’s West Coast

Scotland’s West Coast is perfect for a campervan road trip, offering rugged landscapes, historic castles, and charming fishing villages. The Isle of Skye is a highlight, with its dramatic cliffs and misty mountains. Take in the beauty of Loch Lomond and explore the ancient sites of the Highlands, all while enjoying the comfort and freedom of campervan travel.

  • Route: A tour of Scotland’s West Coast, passing through the Isle of Skye and Loch Lomond.
  • Recommended Campsites: Camusdarach Campsite, Glen Etive Camping.
  • Suggested Activities: Visit Eilean Donan Castle, hike the Cuillin Mountains, and tour the Whisky Trail.

Conclusion

A campervan trip is the perfect way for families to bond, explore new destinations, and create lifelong memories. Whether you’re seeking adventure in the wilds of Patagonia or enjoying the scenic beauty of Europe’s Alps, these 10 destinations will provide the perfect setting for your next road trip. So pack up your campervan, gather your loved ones, and get ready to embark on a journey like no other.

Singapore is widely known as a food lover’s paradise, and it’s easy to see why. With a rich blend of Chinese, Indian, and Malay food cultures, along with influences from all around the world, Singapore offers an incredible range of flavors and dishes that cater to every taste. Whether you’re a fan of mild dishes or enjoy fiery hot curries, this vibrant city has something for everyone. Singaporeans take their food seriously, and it’s no surprise to see even the wealthiest lining up at local hawker stalls for delicious, budget-friendly meals. If you’re planning a visit, here’s our guide to five essential dishes you must try during your stay.

1. Hainanese Chicken Rice

Start your Singapore culinary adventure with Hainanese Chicken Rice—a dish that’s as simple as it is iconic. The chicken is cooked to perfection, offering tender meat with a rich, oily skin and a delicate gelatine layer. Served with rice cooked in chicken broth, it’s accompanied by a dark soy drizzle and a zesty chili dip. Easily found at hawker centres, this dish is a staple of Singaporean cuisine and even regarded as the national dish. Look for the white chickens displayed behind the glass at hawker stands, signaling the freshness of this beloved meal.

2. Singapore Chilli Crab

Though often considered a bit cliché these days, Singapore Chilli Crab is undeniably a must-try. Stir-fried in a tangy, sweet, and spicy tomato-based sauce, the crab is served in its shell, and you’ll need a crab cracker to break into the claws and scoop out the tender meat. Mud crabs are typically used, though you’ll also find various other crab varieties in restaurants around Singapore’s Boat Quay. Despite being a bit pricey, it’s a perfect dish for those looking to indulge while watching the crabs being prepped in the lively atmosphere of this iconic area.

3. Fish Head Curry

Fish Head Curry is a dish that beautifully combines Singapore’s Chinese and Indian culinary influences. This spicy curry, made with the head of a red snapper, includes a rich, soupy sauce filled with vegetables. It’s a unique and flavorful dish that originated when an Indian chef decided to add a fish head to his curry to appeal to Chinese customers. The result was an unforgettable dish that’s now a favorite in Singapore. If you’re not up for the full fish head experience, smaller portions can be found at local hawker stalls, particularly in Little India, where it’s a popular offering.

4. Roti Prata

End your food-filled day with Roti Prata, a beloved dish that’s popular in Singapore’s late-night food scene. This crispy, golden flatbread is often served with spicy curry and is the perfect comfort food after a long day of eating. Though Roti Prata has its roots in India, Singapore has perfected it. For a twist, try Murtabak, a stuffed version of roti with chicken or mutton, or Kottu Roti, where roti is chopped up and mixed with meat and eggs. These dishes are typically served with your right hand, as tradition dictates in the region.

5. Nasi Lemak

A true Singaporean classic, Nasi Lemak is a dish that represents the country’s Malay heritage. This simple but satisfying meal features coconut rice, crispy anchovies (ikan bilis), roasted peanuts, and a spicy sambal sauce made with ground chili, lime, and shrimp paste. Though often enjoyed at breakfast, Nasi Lemak can be found throughout the day and is occasionally wrapped in banana leaves with grilled meats and other delicious accompaniments. It’s an affordable and tasty meal that’s perfect for a quick bite or takeaway.

Singapore’s food scene is one of the most diverse and exciting in the world, offering a wide variety of flavors that cater to every preference. From hawker centres to high-end restaurants, there’s something for everyone. These five dishes—Hainanese Chicken Rice, Chilli Crab, Fish Head Curry, Roti Prata, and Nasi Lemak—are just the beginning of your culinary journey in Singapore, and they’ll give you a true taste of the city’s food culture.

Omani cuisine is a rich blend of Arabian, African, and Indian influences, creating a unique and flavorful culinary experience. From aromatic spices like cardamom and saffron to hearty meat dishes and refreshing beverages, Oman offers a wide range of delectable foods. Whether you’re visiting for the first time or returning to explore more, here are the top 10 Omani dishes that should be on your must-try list.

1. Shawarma

Shawarma is a beloved street food throughout the Middle East, and Oman is no exception. This delicious wrap is made with marinated meat (chicken, beef, or lamb) that’s slow-cooked on a vertical rotisserie. Served in warm pita bread with tahini sauce, pickles, and fresh vegetables, shawarma is a quick and satisfying meal. For the best shawarma, head to Muscat’s bustling Mutrah Souq.

2. Mishkak

Mishkak is a popular Omani version of kebabs, typically made with marinated lamb or chicken. The meat is skewered and grilled over an open flame, seasoned with a mix of spices like cumin, coriander, and turmeric. Often served with saffron rice, Mishkak is best enjoyed at the lively food stalls of Muscat’s Mutrah Souq.

3. Shuwa

Shuwa is a traditional Omani dish often served during special occasions like weddings and religious festivals. This slow-cooked dish involves marinated lamb or goat wrapped in banana or palm leaves and cooked underground in a sand oven for up to 48 hours. The result is tender, flavorful meat that embodies Oman’s hospitality and generosity. You’ll find the best Shuwa at local Omani restaurants or during festive gatherings.

4. Majboos

Majboos is a savory rice dish that’s a staple in Omani cuisine. It consists of basmati rice, meat (usually chicken or lamb), and a blend of spices like turmeric, dried lime, garlic, and tomatoes. This hearty dish is served at both traditional Omani restaurants and street food stalls across the country, making it a must-try when exploring Oman’s food scene.

5. Harees

Harees is a comforting, porridge-like dish made by slowly cooking wheat and meat (typically chicken or lamb) until it reaches a creamy, smooth consistency. Often flavored with ghee and spices, Harees is commonly eaten during Ramadan and other cultural events. You can find it at local food markets and traditional Omani restaurants.

6. Mushaltat

Mushaltat is a delicious layered bread filled with spiced meat, onions, and herbs. It’s cooked on a hot griddle, giving it a crispy exterior and soft interior. This dish can be enjoyed as a snack or a main course, and it’s commonly found at street food stalls, souks, and traditional Omani restaurants.

7. Halwa

Omani Halwa is a sweet, sticky dessert made with ingredients like sugar, ghee, rosewater, saffron, and cardamom. It’s often served in small, bite-sized pieces, making it the perfect treat after a meal. You can find some of the best Halwa in Muscat and Nizwa, particularly in traditional sweet shops and local souks.

8. Kahwa

Kahwa is a spiced green tea that’s an essential part of Omani hospitality. Made with green tea leaves, saffron, cardamom, and rosewater, it’s traditionally served in small cups along with dates or Omani Halwa. Kahwa is widely available throughout Oman in cafes, markets, and at social gatherings, offering a fragrant and soothing beverage experience.

9. Laban

Laban is a traditional Omani drink made from yogurt, water, and salt. Served chilled, it’s particularly refreshing on hot days and is known for its cooling properties. Laban can be found at street food stalls, local markets, and traditional restaurants, providing a savory and refreshing alternative to sweet beverages.

10. Mashuai

Mashuai is a luxurious dish that features a whole lamb or goat marinated with spices like turmeric, cinnamon, and black lime. It’s slow-roasted until the meat is tender and flavorful, then served on a bed of aromatic rice with a tangy sauce made from dried limes. Mashuai is often prepared for special events and can be found in traditional Omani restaurants and at festive celebrations.

Conclusion

Oman’s food scene is rich with history and diverse influences, offering an array of dishes that are as flavorful as they are unique. From the street-side shawarma to the indulgent Shuwa, each dish tells a story of Omani culture, hospitality, and tradition. Whether you’re enjoying a simple meal or celebrating a special occasion, Omani cuisine promises to deliver a memorable dining experience.

Backpacking quilts have become increasingly popular, and for good reason. Unless you’re facing extreme cold or high altitudes, you might not need a sleeping bag. Both Alyssa and I switched to using quilts, and we’ve never looked back. If you’re looking for an affordable yet high-quality quilt, the UGQ Bandit is a fantastic option.

(Note: While the price of the UGQ Bandit has risen since we first purchased ours, I still believe it offers the best value for a quilt that’s both customizable and well-made.)

Why Choose a Quilt?

If you’re not familiar with backpacking quilts, the concept can be a little confusing. A quilt is essentially a lightweight bed covering made from down insulation, similar to a sleeping bag but without the zipper. Instead of being enclosed, you use it like a blanket, leaving the bottom open. Most quilts will strap around your sleeping pad to stay in place.

Why switch to a quilt? Traditional sleeping bags have a major flaw—down insulation doesn’t work when compressed. When you sleep on it, the insulation loses its effectiveness. A quilt removes this issue by relying on your sleeping pad for insulation from the ground. This simple design saves weight while still keeping you warm.

For me, a quilt is a game-changer. It’s lighter, more versatile, and far more comfortable than a sleeping bag—except for winter use.

Considerations Before You Switch

While quilts are great, there are a few things to keep in mind. First, because quilts don’t have a hood, you’ll need a beanie or down hood in cooler temperatures. However, the weight savings are significant, and these hoods are often multifunctional and cozy.

Another important point is that quilt prices, even at the “budget” end, can still be fairly high, usually between $170 and $250. Quilts are often custom-made by small U.S. companies, which contributes to the cost. While expensive compared to traditional budget gear, they’re still far cheaper than premium sleeping bags, which can run upwards of $400.

Even if you’re investing more upfront, a well-made quilt like the Bandit will last you for many years, making it worth the cost.

UGQ Bandit: The Best Value Backpacking Quilt

The UGQ Bandit is a standout when it comes to value. It’s priced right in the middle—more expensive than the Hammock Gear Economy Burrow, but not as high-end as brands like Feathered Friends or Katabatic. Despite the price bump, the Bandit offers excellent quality, weight savings, and customization for only about 10% more than the Burrow.

For example, you can get a full-size 20-degree Bandit for around $260. The Burrow with similar specs costs about $215 but weighs almost 4oz more. For just a small increase in price, the Bandit offers lighter weight and better quality.

While options like the Paria Outdoors Thermodown 15-Degree Quilt are cheaper at $170, they tend to be heavier and lack customization.

UGQ Bandit Features Breakdown

The Bandit is designed with vertical down chambers along the torso to provide a snug fit while retaining warmth. The footbox features horizontal chambers to trap warmth around your feet. The quilt’s overall design maximizes comfort and warmth without extra bulk.

Tech Specs:

  • Fill: 800-fill duck down, 850-fill goose down, or 950-fill goose down
  • Temperature ratings: Available from 0°F to 50°F in 10-degree increments
  • Width: 50” or 55”
  • Length: 66”, 72”, 78”, or 84” (with XL options for larger sizes)
  • Overstuff options: None, 1oz, or 2oz
  • Footbox options: Zippered, drawcord, boxed flat sewn, or insulated
  • Pad attachment system: Included

Fill Options

The Bandit uses only down fill, which offers superior insulation to synthetic materials. While down is more expensive, it’s also lighter and more compressible. UGQ offers different fill power options: 800, 850, and 950 fill. The 800 fill is the most affordable and provides excellent warmth for the weight, but the 950 fill is lighter if you’re willing to spend a bit more.

For most people, the 800 fill is perfectly sufficient. The weight difference between 800 and 950 fill is minimal, especially for shorter quilts. The 850 fill is a nice middle ground for those who want better performance at a moderate price.

Temperature Rating

The Bandit’s temperature ratings are accurate, with each rating being the limit of comfort. For example, if you choose a 10-degree Bandit, you’ll likely be comfortable down to around 20°F depending on how you sleep. If you sleep warm, you might want a quilt with a lower temperature rating, but quilts are very versatile. You can easily adjust by using it as a blanket if it gets too warm.

Width and Length

The standard width is 55”, which suits most people. If you’re smaller or sleep mostly on your back, you could opt for the narrower 50”. The Bandit is available in four lengths, and it’s recommended to choose a quilt that’s slightly longer than your height. I’m 5’7″ and use the 66” quilt, but taller users may prefer the 72” option for more room.

Customization Options

One of the Bandit’s best features is how customizable it is. You can select your fill type, temperature rating, fabric, and even colors from a wide variety of options. This level of customization ensures that you get a quilt that fits your specific needs and preferences. While these options can add to the price, they also make the Bandit one of the most adaptable quilts available.

The Good

  • Excellent Value: Despite not being the cheapest option, the Bandit offers great value for its price, especially considering its weight and customization options.
  • Customizable: The range of fill choices, colors, and features allows you to tailor the quilt to your exact needs.
  • Quality Construction: The Bandit uses high-quality down and durable fabrics, providing long-term performance.

The Not So Good

  • Weight: The Bandit is slightly heavier compared to some other ultralight options. If saving weight is your top priority, you might want to look into lighter alternatives like the Hammock Gear Burrow or the Paria Outdoors Thermodown Quilt.

Final Thoughts

The UGQ Bandit remains our top pick for the best value backpacking quilt. While it may not be the absolute lightest option available, it strikes the perfect balance of price, customization, and quality. If you’re looking for a reliable, well-built quilt that won’t break the bank, the Bandit is a fantastic choice.

If you’re considering a relaxing, all-inclusive vacation in China, Club Med offers a perfect blend of comfort, adventure, and culture across its four exceptional resorts. Known for creating seamless vacation experiences, Club Med has a long-standing reputation for catering to all types of travelers, whether you’re seeking thrilling activities or a quiet retreat. This guide will help you navigate through your choices and ensure you select the ideal Club Med destination for your next getaway.

Why Club Med China is Your Ideal Vacation Spot

When it comes to a vacation that caters to everyone in the family, Club Med China stands out. Whether you’re planning a family trip, a romantic getaway, or a solo adventure, these resorts offer something for every type of traveler.

Club Med is widely praised for its variety of activities, which are guided by expert staff members known as Gentle Officers (G.O.). No matter if you’re new to a sport or an experienced enthusiast, you’ll have plenty of opportunities to learn and explore. Plus, you won’t have to worry about a language barrier or finding a guide on your own, as the G.O.s are always available to help.

Another major benefit is the resorts’ stunning locations. Set in scenic regions, the resorts not only offer modern amenities but also incredible natural views. For example, Club Med Changbaishan is nestled in a UNESCO World Heritage site, allowing visitors to experience China’s natural beauty up close.

For families, Club Med China provides even more perks. Children under 4 can stay and dine for free, while those aged 4 to 17 enjoy discounted rates. The resorts also offer specialized childcare services, such as Baby Club Med® and Mini-Club Med®, ensuring that parents can unwind while the kids enjoy age-appropriate activities.

Exploring the Best Club Med Resorts in China

Club Med Changbaishan

Located in the Changbaishan Biosphere Reserve, this resort offers an unforgettable experience surrounded by snow-capped peaks and crystal-clear lakes. Club Med Changbaishan is perfect for those who love winter sports, as it features pristine slopes for skiing and snowboarding. Whether you’re a beginner or an experienced skier, the resort’s professional guides will help you navigate the mountain terrain.

If you prefer a more relaxed pace, you can enjoy a guided hiking tour, taking in the region’s stunning vistas and fresh air. Afterward, head to the resort’s Wellness Oasis, where you can unwind in mineral-rich hot springs or indulge in a rejuvenating spa treatment.

Club Med Changbaishan is ideal for travelers who appreciate both outdoor adventures and moments of tranquility in a spectacular natural setting.

Club Med Yabuli

For avid winter sports enthusiasts, Club Med Yabuli is the go-to destination. Located in Harbin, this premier ski resort has been a training ground for China’s national downhill ski team, making it a top choice for those serious about their snow sports. The resort boasts over 50 kilometers of slopes, catering to both beginners and experts.

When you’re not on the slopes, enjoy a variety of indoor activities like table tennis, mahjong, or indoor climbing. For relaxation, indulge in a spa treatment or take a yoga class to unwind after a day of adventure.

Club Med Yabuli is perfect for those looking to immerse themselves in winter sports and enjoy a vibrant, energetic resort atmosphere.

Club Med Beidahu

If you’re after a winter wonderland with a touch of variety, Club Med Beidahu is a fantastic choice. Situated in Jilin, the resort offers a perfect balance of winter sports and non-snow activities. In addition to skiing and snowboarding, guests can enjoy yoga, live performances, and even magic shows.

Families with children will love the array of entertainment options, including themed winter games and a family-friendly wellness experience. The resort also offers a luxurious spa, where you can unwind with treatments using Dead Sea minerals for an extra relaxing touch.

Club Med Beidahu is ideal for families or anyone looking for a well-rounded experience with both high-energy activities and peaceful relaxation.

Club Med Lijiang

For those seeking a warmer climate, Club Med Lijiang in Yunnan is a great alternative. This resort offers an entirely different experience compared to the snow-covered resorts. Guests can enjoy the stunning views of the Jade Dragon Snow Mountain without having to deal with snow sports. The resort’s architecture is inspired by local Naxi culture, and each room has a balcony, allowing you to fully enjoy the beauty of the surrounding mountains.

Lijiang also offers a wide range of activities, including archery, trapeze, and even pickleball. One of the highlights of this destination is the cultural immersion experiences available to guests. Take a guided tour to learn about the region’s rich history and culture, including the chance to explore the Naxi people’s ancient traditions and the beautiful Yuhu Lake.

Club Med Lijiang is the perfect choice for travelers who want to combine cultural exploration with relaxation and outdoor activities in a picturesque setting.

Special Offers and Discounts

To make your Club Med China experience even more special, take advantage of limited-time discounts that offer up to 30% off your stay. These special offers are available during select periods, so be sure to book your vacation ahead of time to secure the best rates.

Whether you’re drawn to the snow-covered slopes of Changbaishan, the winter wonderland of Yabuli, the balanced experiences at Beidahu, or the sunny escapes in Lijiang, Club Med China offers the perfect getaway for every traveler.

By choosing Club Med China, you’re guaranteed a vacation filled with relaxation, adventure, and memories to last a lifetime.

Traveling has always come with its fair share of challenges, and staying connected while abroad was always a major hurdle for me. After years of dealing with SIM cards, phone providers, and the stress of setting up data plans in new countries, I finally switched to eSIM technology—and let me tell you, it’s a total game-changer.

For those unfamiliar with eSIMs, these are virtual SIM cards that offer the same functionality as traditional physical SIM cards, but without the hassle of physically swapping cards. I had heard about eSIMs for a while, but it wasn’t until recently that I decided to give it a go. Now that I’ve experienced the convenience firsthand, I can confidently say that the days of battling with old SIM cards are behind me.

Here’s a breakdown of what eSIMs are, how to use them for travel, and why I now swear by them for all my trips abroad.

What Exactly is an eSIM?

In simple terms, an eSIM (embedded SIM) is a digital version of the physical SIM card that your phone uses to connect to a mobile network. Instead of physically swapping out SIM cards when you travel, eSIMs let you activate a new plan online and add it to your phone’s settings.

The best part? You can keep your existing phone number active while adding a local or international plan to stay connected without any hassle.

How to Use an eSIM for Travel

Using an eSIM for travel is as easy as online shopping. Here’s a step-by-step guide to how I’ve used it on my recent trips:

Step 1: Choose Your eSIM Plan
The first step is to pick the right eSIM plan. There are many providers offering different data plans, so you’ll want to shop around to find the best deal for your destination. Consider factors like data needs, coverage, and the countries where the eSIM provider operates. For example, I’ve used Saily eSIM, which has been easy to navigate and affordable, but there are many great options available like Airalo, Holafly, and Gigsky.

Step 2: Purchase the eSIM
Once you’ve chosen the right plan, purchasing the eSIM is simple. You’ll typically enter your payment details, and within minutes, you’ll receive a confirmation email with instructions for setting up the eSIM on your phone. It’s a straightforward process, and you’ll need to confirm that your phone is compatible with eSIM before purchasing.

Step 3: Set Up the eSIM on Your Phone
This is where the magic happens. After receiving your confirmation email, follow the instructions provided by the eSIM provider to install the eSIM. Some services use apps, while others provide a QR code for easy installation. The beauty of this process is that you don’t need to remove your current SIM card, meaning you can easily switch between your regular plan and your eSIM when you arrive at your destination.

Step 4: Update Your Settings
Before you leave for your trip, make sure your phone settings are ready. In the case of an iPhone, for instance, you’ll add the eSIM under the “Mobile Data” settings. It’s a quick process, and you can load both your regular SIM and your eSIM at the same time.

Step 5: Activate the eSIM at Your Destination
Once you arrive at your destination, simply activate the eSIM by switching off your primary SIM card in your phone settings. Then, turn on the eSIM, enable mobile data, and you’re good to go! You’ll have access to internet services without the need for buying expensive local SIM cards or dealing with language barriers.

Why eSIM is the Best Choice for Travel

For me, eSIMs have made staying connected abroad easier and more affordable. Traditionally, setting up a phone plan when traveling meant dealing with hidden charges, long waits in stores, and sometimes complicated paperwork. With eSIMs, it’s all done online, and I can activate my plan as soon as I land in my destination.

Not only does this save me time, but it also prevents the stress of swapping SIM cards, especially if I’m in a hurry to get online as soon as I arrive. With an eSIM, I’ve cut out all those middlemen, and I can be sure my data plan will work from the moment I step off the plane.

Is eSIM Worth It for Travelers?

In short, yes. eSIM technology has streamlined the whole process of staying connected abroad. I can now easily manage multiple plans, whether it’s a local plan for a few weeks or a global data plan for longer trips. As someone who travels often, the convenience of an eSIM cannot be overstated.

Even if you’re not very tech-savvy, setting up an eSIM is straightforward. I’m not exactly a tech expert myself, but I had no trouble at all getting my eSIM set up and running. If I can do it, so can you!

Which eSIM Provider Should You Choose?

While there are many providers to choose from, I recommend Saily for its simplicity and affordability. The app is user-friendly, and I’ve had a seamless experience with their service. However, other popular providers like Airalo and Holafly also offer great coverage and reliable plans. Be sure to read reviews and check if the provider supports your destination before purchasing.

Can You Get an International Phone Number with an eSIM?

Yes, most eSIM providers offer plans that include a local or international phone number. However, I typically don’t need an international phone number because I prefer to use apps like WhatsApp, Facebook Messenger, or Instagram Messenger to stay in touch with people while traveling. That said, if you need a phone number for calls or texting, you can easily get one through most eSIM services.

Final Thoughts

eSIMs have truly revolutionized how I stay connected abroad. With no physical SIM card to swap out, no expensive roaming charges, and the convenience of managing everything from my phone, I can’t recommend eSIMs enough. It’s an easy, affordable, and reliable way to stay connected, and I can’t imagine traveling without one now.

When it comes to classic Asian dishes, there are a few questions that spark heated debates. One that often crosses my mind is: Which is better, Thailand’s Khao Man Gai or Singapore’s Hainanese Chicken Rice? It’s a question I frequently ask when meeting Singaporeans in Thailand, and without fail, they firmly claim that Singapore’s Hainanese Chicken Rice is the superior dish. When I ask Thais the same question, however, their response is usually more indifferent, with little enthusiasm for a comparison.

Hainanese Chicken Rice is considered a national treasure in Singapore. It’s a dish with deep roots in the country’s culture, and it’s revered as a symbol of pride. The perfect version of this dish, which originated in Hainan, China, features tender chicken with a crispy, oily skin and a gelatinous layer underneath. The rice, cooked in chicken broth, adds to the dish’s richness, while a drizzle of dark soy sauce or a tangy chili dip often completes the experience.

Khao Man Gai: The Humble Thai Favorite

On the other hand, Khao Man Gai is somewhat of an understated dish in Thailand. While it’s a favorite among locals, it often doesn’t receive the same fanfare as more iconic dishes like green curry, pad Thai, or tom yum. In fact, you’ll find Khao Man Gai stalls in virtually every food court across the country, usually nestled between other Chinese-inspired dishes like char siu pork, roast duck, and stewed pork leg. This humble food is often seen as a quick and easy meal option, not necessarily something to be celebrated. It’s often served with less desirable parts of the chicken, including a side of bone stock soup and occasionally congealed chicken blood (though I tend to skip that part). Despite its unpretentious nature, Khao Man Gai is a staple in Thai daily life.

Why Khao Man Gai Gets the Edge

For me, Khao Man Gai edges out Hainanese Chicken Rice, but not because of the chicken itself. It’s all about the sauce. Thai Khao Man Gai comes with a distinctive chili sauce that combines ginger, garlic, fermented soybean, chili, white vinegar, and soy sauce. This sauce takes the dish to another level, and while you might argue that the sauce isn’t technically part of the dish, it’s always served alongside the chicken, and in my view, it’s what makes the dish truly special. While both dishes may share similarities, for me, the sauce is the standout feature of Khao Man Gai. The chicken plays a supporting role, rather than being the star of the show. The rice, too, is crucial but follows closely behind the sauce in importance.

The Verdict

While I’m partial to the unique flavor profile of Khao Man Gai, there’s no denying that Singapore holds the edge when it comes to the overall quality and prestige of its chicken rice. Singapore’s hawker centers, with their Michelin-starred stalls and obsession with food perfection, simply cannot be compared to the more casual, laid-back approach to eating in Thailand. Thailand is fantastic for its vibrant street food scene, but when it comes to chicken rice, Singapore’s reputation as a food destination is in a league of its own.

In conclusion, Khao Man Gai may win in terms of the sauce, but Singapore’s Hainanese Chicken Rice reigns supreme in the broader context of culinary excellence.