Tokyo, a city renowned for its vibrant food scene, offers a culinary adventure like no other. Whether you’re seeking street food or fine dining, the city provides a vast array of options for every palate and budget. This guide will help you navigate Tokyo’s diverse food offerings and recommend where to find the most authentic experiences. From casual street snacks to high-end cuisine, Tokyo is a food lover’s dream.

What to Eat and Where in Tokyo

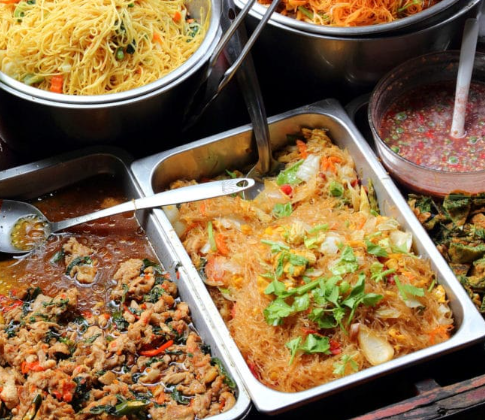
Tokyo’s food scene can be overwhelming with the multitude of choices available. The key to enjoying a great meal lies in knowing where to go and what to order. To help you make the most of your dining experience, I’ve compiled a list of must-try dishes along with some fantastic restaurants to visit. These spots are known for their authentic, high-quality food and reasonable prices, offering a true taste of Tokyo.

While language barriers can sometimes be a challenge in Tokyo, the food often speaks for itself, so don’t be discouraged by places without English menus. Many spots, despite their humble appearances, serve exceptional food that locals swear by.

Must-Try Dishes in Tokyo

1. Takoyaki
A beloved street food, Takoyaki consists of dough balls filled with tender pieces of octopus, cooked on a special griddle. These tasty snacks are often topped with a variety of sauces, from soy sauce to mayonnaise, creating a savory bite that’s a must-try in Tokyo.
Where to Eat Takoyaki:

  • Gindako (multiple locations)
  • Fukuyoshi, Ginza
  • Takoazabu, Omotesando

2. Yakitori
Yakitori are skewers of grilled chicken and vegetables, often enjoyed with a cold beer. Common types include chicken heart, chicken skin, and chicken meatballs, as well as vegetables like shishito peppers and onions. Whether enjoyed as a main meal or a snack, yakitori is a favorite in Tokyo.
Where to Eat Yakitori:

  • Look for small yakitori shops throughout the city, particularly those with a local crowd.

3. Okonomiyaki
This savory pancake/omelet hybrid is made with a variety of ingredients like cabbage, pork belly, and shallots, then cooked on a hot plate and topped with a tangy sauce. There are regional variations, including the Tokyo-style Monjayaki, which is more brothy.
Where to Eat Okonomiyaki:

  • Sometaro Okonomiyaki, Asakusa

4. Ramen
Ramen is a Japanese staple, consisting of long noodles served in a rich, simmered broth. Tokyo offers a variety of ramen styles, from the soy-based Shoyu to the creamy Tonkotsu. Ramen shops are scattered across the city, each offering their unique twist on this classic dish.
Where to Eat Ramen:

  • Ramen Jiro (multiple locations)
  • Ichiran (multiple locations)
  • Mutekiya, Ikebukuro

5. Udon
Udon noodles are thicker than ramen and have a chewy texture. They can be served hot in a broth, cold with dipping sauce, or even grilled. Udon provides a hearty, satisfying meal that’s perfect for noodle lovers.
Where to Eat Udon:

  • Shibuya Station area
  • Jiyugaoka Station area

6. Miso Soup
Miso soup is a Japanese classic, made with a dashi broth and miso paste. It’s light yet full of umami flavor and is often enjoyed at any meal time.
Where to Eat Miso Soup:

  • Katsukura, Shibuya
  • Tonkatsu Tonki, Meguro

7. Soba
Soba noodles, made from buckwheat flour, are often served cold with a dipping sauce or in a hot soup. They are a light and healthy option that pairs wonderfully with tempura.
Where to Eat Soba:

  • Narutomi Soba, Ginza
  • Kanda Matsuya, Asakusa

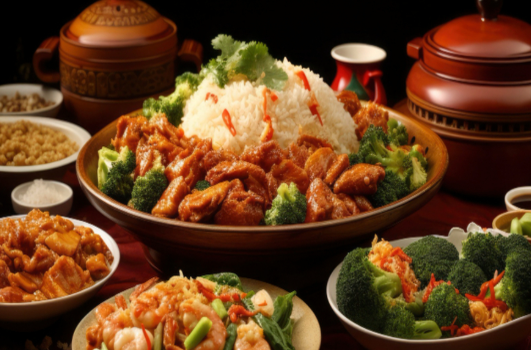
8. Sushi and Sashimi
No trip to Tokyo is complete without sushi and sashimi. The city is known for its high-quality seafood, prepared with meticulous attention to detail. Whether you’re looking for an affordable conveyor belt sushi restaurant or a high-end sushi experience, Tokyo has it all.
Where to Eat Sushi and Sashimi:

  • Tokyo Fish Market
  • Genki Sushi (multiple locations)

9. Tonkatsu
Tonkatsu is a breaded and deep-fried pork cutlet, served with shredded cabbage, rice, and tonkatsu sauce. Despite being fried, it’s surprisingly light and flavorful.
Where to Eat Tonkatsu:

  • Tonkatsu Aoki, Hamamatsucho

10. Unagi
Grilled freshwater eel, coated in a sweet soy-based sauce, is a Tokyo delicacy. Whether served over rice (unadon) or as sushi, unagi offers a rich, smoky flavor that’s hard to resist.
Where to Eat Unagi:

  • Tokyo Fish Market

Sweet Treats and Snacks

1. Crepes
Japanese crepes are a popular snack, especially in the Harajuku area. These thin, crispy treats are filled with an array of delicious options, from whipped cream and fresh fruit to savory fillings.
Where to Eat Crepes:

  • Harajuku

2. Mochi
Mochi is a sticky rice paste dessert that’s chewy and can be filled with various fillings, such as sweet red bean paste or matcha. Freshly made mochi is a delightful experience.
Where to Eat Mochi:

  • Gekkou, Ikebukuro

3. Dango
These chewy rice flour balls are often skewered and served with a sweet soy sauce. Dango is a popular street snack and perfect for a quick treat while exploring Tokyo.
Where to Eat Dango:

  • Various markets and street stalls

4. Taiyaki
Taiyaki are fish-shaped cakes filled with sweet fillings like red bean paste or custard. Their playful shape and sweet flavors make them a fun snack to try.
Where to Eat Taiyaki:

  • Street food stalls

5. Melonpan
This sweet bread has a crunchy, sugary crust and a soft, fluffy interior. Often found with whipped cream or ice cream, melonpan is a must-try snack.
Where to Eat Melonpan:

  • Asakusa

Fine Dining Experience: Kaiseki

Kaiseki is a traditional Japanese multi-course meal that showcases the artistry of Japanese cuisine. It involves a series of small, delicate dishes that focus on seasonal ingredients and perfect presentation. While Kaiseki originates in Kyoto, it’s also available in select Tokyo restaurants, offering an exceptional culinary experience.
Where to Eat Kaiseki:

  • Akasaka Eigetsu, Akasaka
  • Aoyama Gato, Harajuku

Finding Local Dining Gems in Tokyo

To discover the best local restaurants in Tokyo, look for spots with long queues—these places are often packed with locals and offer some of the best meals in town. Also, using tools like Google Maps and asking locals for recommendations will help you uncover hidden food treasures.

Tokyo’s food scene is incredibly diverse, and with a little guidance, you can explore the city like a true local, savoring each authentic dish along the way.

If you’re planning a trip to San Carlos de Bariloche, you’re in for an incredible adventure. Nestled in Argentina’s stunning Patagonia region, Bariloche is home to some of the most scenic and diverse hiking trails. Whether you’re into short hikes, all-day treks, or even a bit of cycling, the breathtaking landscapes of the Los Andes await you. Here’s a guide to some of the best hikes and outdoor activities in and around this charming mountain town.

1. Cerro Campanario

  • Difficulty: Easy
  • Distance: 1 km
  • Time: 30-40 minutes
  • How to Get There: Take bus number 20 from downtown Bariloche. The ride takes about 30 minutes.
    The short but steep hike up Cerro Campanario rewards you with one of the most stunning views in Bariloche. From the summit, you’ll enjoy 360-degree panoramas of Lago Nahuel Huapi, the Perito Moreno Lake, and the surrounding snow-capped mountains. For those who prefer not to hike, the funicular offers an easy ride to the top. Afterward, relax with a cup of coffee at the mountaintop cafe.

2. Cerro Llao Llao

  • Difficulty: Easy
  • Distance: 7-8 km loop
  • Time: 4-5 hours
  • How to Get There: Take bus number 20 towards Puerto Pañuelo and get off near the Llao Llao Hotel. From here, walk for about 30 minutes to the trailhead.
    Cerro Llao Llao offers a scenic hike with views of the nearby lakes, including Lago Escondido. This loop trail takes you through lush forests and along pristine shorelines. Stop by Playa Villa Tacul for a relaxing break or have a picnic at one of the lake’s serene spots. The summit offers a fantastic viewpoint, perfect for appreciating the sparkling blue lakes below.

3. Cycling the Chico Circuit

  • Difficulty: Moderate
  • Distance: 24 km loop
  • Time: 4-5 hours
  • How to Get There: Head towards Cerro Campanario and get off at km18.6. Rent a bike from one of the local shops, like Cordillera Bike Rental.
    The Chico Circuit is a great way to explore Bariloche if you enjoy cycling. The loop offers plenty of chances to stop and take in the stunning views of the lakes and mountains. While some hills are steep, the journey is manageable, and the stops along the way—like Patagonia Brewery—make it all worthwhile.

4. Refugio Frey and Laguna Schmoll

  • Difficulty: Moderate/Hard
  • Distance: 10 km to Refugio Frey + 2 km to Laguna Schmoll
  • Time: 4 hours
  • How to Get There: Take bus number 55 to the ski center car park, where the trail begins.
    For those seeking a more challenging trek, the hike to Refugio Frey is an unforgettable adventure. The trail winds through forests and alongside mountain lakes. If you’re up for an even tougher challenge, continue to Laguna Schmoll—one of the most stunning hidden gems in the area. This part of the hike is steep and requires some navigating, but the views are absolutely worth it.

5. Lago Gutiérrez

  • Difficulty: Easy
  • Distance: 3 km
  • Time: 1 hour
  • How to Get There: Take bus number 50 to the end, just after the bridge.
    This short and easy trail is perfect for families or those looking for a quick escape into nature. The views over the emerald waters of Lago Gutiérrez are serene, and you can take a break at Cascada de Los Duendes, a beautiful waterfall along the way.

Additional Tips for Hiking in Bariloche

  • Getting Around: Use the Sube Card for buses in Bariloche, just like in Buenos Aires. These can be topped up at local kiosks.
  • Weather Considerations: Bariloche weather can be unpredictable, so pack for all conditions, especially if you’re hiking to higher altitudes.
  • Chocolate Lovers: Bariloche is famous for its chocolate. Be sure to try the local shops and grab some sweet treats after your hikes!

How to Reach Bariloche

  • From Buenos Aires: Flights are frequent and can be as affordable as $50 USD. For a longer, scenic journey, take the bus to Bariloche.
  • From El Chaltén: Be prepared for a 24-hour bus ride. Flights from El Calafate are also available for a faster, albeit more expensive, option.

Where to Stay in Bariloche

  • Bonita Lake House: This cozy spot near Cerro Campanario offers stunning views and easy access to some of the best hiking in the area.
  • Hospedaje Penthouse: Perfect for those visiting during peak seasons like Christmas, with festive dinners and a friendly atmosphere.
  • Hotel Kawa Mountain Retreat: A serene, upscale retreat with panoramic views, offering peace and relaxation in nature.

Bariloche, with its rich natural beauty, diverse hiking trails, and charming town atmosphere, is a must-visit destination for nature lovers and adventure seekers alike. Whether you’re trekking through dense forests or cycling around the picturesque lakes, this Patagonia gem has something for every outdoor enthusiast.

The South Coast Wilderness Trail (SCWT) is one of Washington’s best-kept secrets, offering a unique and unforgettable backpacking experience along the Pacific Ocean. But, this is not a hike to be taken on a whim. To truly enjoy and tackle this coastal gem, proper planning is essential. With the right amount of preparation, your adventure will undoubtedly become one of your favorite Pacific Northwest experiences.

Here’s your complete guide to planning your SCWT trip, from choosing the best route to understanding tide charts and packing the right gear.

Trail Overview

  • Distance: 17.5 miles
  • Elevation Gain: 1,920 feet
  • Difficulty: Moderate
  • Best Time to Hike: May to September
  • Area: Olympic Peninsula

Step 1: Choose Your Route

The SCWT offers two primary route options, each offering a unique experience. Your decision will affect how the rest of your hike unfolds.

North to South (Third Beach to Oil City)

This route starts with more beach terrain and ends with a more forested section. If you want a gradual build-up to the tougher sections, like the boulders at Jefferson Cove, this is the route for you. Ending at Oil City provides a more secure place to park, and you’ll have a nice place waiting for you to rest at the end.

South to North (Oil City to Third Beach)

Starting with the challenging boulders of Jefferson Cove might seem intimidating, but it means the harder portions are behind you early. The rest of the hike offers more relaxing beach views, and you’ll end your journey on a high note. However, be mindful of Third Beach, as break-ins at this trailhead are somewhat common.

Step 2: Permits & Campsites

Permits are a must for this trail. You’ll need to reserve a wilderness permit through Recreation.gov. During the permit process, you’ll also choose your campsites, but don’t worry if you change your mind later. While it’s recommended to have a general campsite in mind to ensure safety and comfort, you’re not locked into your choice.

For the first night, Strawberry Point and Toleak Point are great choices. They offer a relatively short hike of 6-7 miles and plenty of scenic camping spots with easy access to water. If you’re feeling energetic, you can push a bit further and continue on to Toleak Point for an even more scenic sunset view.

On the second day, Mosquito Creek is a wonderful stop with beach and forest camping options. It offers a break from longer miles and gives you a chance to relax and enjoy the surroundings.

Step 3: Understanding Tide Charts

The SCWT is unique in that tide conditions play a crucial role in your ability to cross certain sections of the trail. Understanding tide charts is vital for success on this trail.

You need to plan your crossings when the tides are low enough to safely navigate the rocky beaches and creek crossings. Here’s a basic breakdown of how to read tide charts:

  • High tide: Water is closest to shore.
  • Low tide: Water is further from shore, exposing rocks and beaches.

For safe passage, you’ll want to aim for a tide between 2.0 and 4.0 feet. To prepare, download tide charts for your trip and highlight the times that fit within this window. Be sure to factor in your hiking speed (around 25-35 minutes per mile, depending on terrain and pack weight) and plan your route to reach tide crossings when they’re passable.

Step 4: Make a Detailed Plan

Once you’ve decoded the tide charts, it’s time to plan out your hike. Decide on your pace and how many miles you can comfortably cover in a day, keeping the tide windows in mind.

For example, if you’re hiking from Scott’s Bluff to Strawberry Point, and you know the low tide is between 7 a.m. and 2 p.m., you’ll want to make sure you reach Scott’s Bluff by no later than 1:30 p.m. This will allow enough time to cross safely, with some buffer just in case.

This stage requires a lot of back-and-forth planning to align your hiking distance with the tide schedule. But the payoff is a smooth, well-timed trip where you’re not rushing to beat the tides.

Step 5: Plan Your Transportation

Getting to the trailhead and arranging transportation for a through-hike is a key part of the planning process.

  • By car: From Seattle, the drive is about 3.5 hours via I-5 and Highway 101. But depending on where your hike starts and ends, you might have to drive even further to reach certain trailheads.
  • By ferry: If you’re feeling adventurous, consider taking the ferry from Edmonds Terminal to Kingston Terminal. While not faster, it’s a quintessential Pacific Northwest experience and gives you a chance to relax and enjoy the journey.
  • Shuttle: Since this is a point-to-point hike, consider using a shuttle service. You can either leave your car at one trailhead and take the shuttle to the other, or use two cars and shuttle yourselves between the starting and ending points. If possible, I recommend leaving your car at the Oil City trailhead (safer parking) and taking the shuttle to Third Beach to start your hike.

Step 6: Pick Up Your Permit

Once you’ve made your transportation plans, it’s time to grab your wilderness permit. This must be done in person at the Wilderness Information Center (WIC) in Port Angeles. The staff at the WIC can provide valuable insight into trail conditions, bear safety, and tide timing. If you’re unable to pick up your permit in person, you may be able to arrange a phone interview for permit approval.

Packing List

Here’s a checklist of essential items to bring on your South Coast Wilderness Trail hike:

Essentials:

  • Bear canister (required for food storage)
  • Tide chart and topographic map (printed)
  • Water purifier
  • Tent with rain cover
  • Sleeping bag and pad
  • Camp stove and fuel
  • Cooking utensils and food
  • First-aid kit
  • Hiking boots and weather-appropriate clothes (wool socks, rain jacket, etc.)
  • Headlamp
  • Toiletries and hygiene items

Nice to Have:

  • Waterproof sleeves for maps
  • Gloves for rope climbing sections
  • Camp chair
  • Fire starters (Vaseline-soaked cotton balls are ideal)
  • Journal/book
  • Sandals for camp

Luxuries:

  • Beer (if you’re into it)
  • Hammock
  • Camera for capturing the breathtaking views

Final Thoughts

Planning the South Coast Wilderness Trail may require some effort, but the payoff is well worth it. With stunning coastal views, remote campsites, and the thrill of managing tides and topography, this trail offers a backpacking experience unlike any other in Washington. Take your time to prepare, and you’ll be rewarded with one of the most spectacular hikes in the Pacific Northwest. Happy hiking!

Northern Ireland’s food scene is often a source of fascination for visitors, especially those unaccustomed to its hearty, comfort-driven dishes. During my regular stays in Bangor, I’ve had the chance to introduce my partner Fanfan to the culinary delights that define the region. While she is not always thrilled with the concept of “greasy” food, she’s had her fair share of eye-opening moments with the unique flavors of Northern Irish cuisine. While many associate the area with rich, indulgent food, it’s these very dishes that form the heart of Northern Ireland’s gastronomic identity. Below, I’m sharing a guide to some of the most iconic meals you can find in Northern Ireland.

The Greasy Spoons: A Staple of Northern Irish Breakfasts

In Northern Ireland, greasy spoons are the local diners, serving up hearty breakfasts that have become an essential part of the culture. Different from a coffee shop, these cafés focus on filling meals, with tea or coffee as the main beverage options. Many of them offer an all-day breakfast, so you can enjoy a traditional meal any time of the day. Expect to find plenty of fried food, including eggs, bacon, sausages, and more.

The Ulster Fry: The Ultimate Northern Irish Breakfast

No breakfast in Northern Ireland is complete without the legendary Ulster Fry. This dish is similar to a Full English or Full Scottish breakfast but includes some local twists. The Ulster Fry typically features sausages, rashers (bacon), and a fried egg, accompanied by regional favorites such as soda bread and potato bread. While variations exist, you’ll also find optional additions like mushrooms, tomatoes, and baked beans—though some purists might argue that these aren’t essential.

Black and White Pudding: A Unique Delicacy

An essential part of the Ulster Fry is black pudding, a savory blood sausage made with pork fat, oatmeal, onions, and pigs’ blood. While it may sound off-putting to some, it’s a beloved Northern Irish staple. White pudding is also popular, a similar dish that lacks the blood, but still delivers on flavor.

Vegetable Roll: A Spicy, Unexpected Treat

Although it might sound healthy, the vegetable roll is not what it seems. Made with rehydrated leeks and spiced beef, this local dish is a bit of an anomaly. With only 4% vegetables, it’s far more of a savory sausage-like creation, often enjoyed alongside breakfast.

Breakfast Baps: A Breakfast on the Go

For those in a hurry, breakfast baps are a perfect solution. Essentially, these are Northern Ireland’s version of buns, and they are stuffed with everything you could want for breakfast, including elements from the Ulster Fry. Whether it’s bacon, sausages, or even a full fry-up, everything goes into a soft bap. These portable breakfasts are a hit for those on the move.

Local Breads: A Delicious Sidekick

While bread is usually a sidekick to the main dishes in Northern Ireland, it plays an important role in the region’s food culture. Two breads stand out: soda bread, which uses baking soda as a leavening agent, and potato bread, a flat bread made with mashed potatoes. Both are perfect for sopping up the rich flavors of the Ulster Fry. Another notable bread is Veda, a sweet, sticky malt loaf often enjoyed toasted with butter.

Chip Shop Takeaways: Deep-Fried Comfort

Chip shops are a cornerstone of local fast food culture, with menus offering everything from classic chips (fries) to more unusual creations. One of the most iconic dishes is the “Fish Supper” (fish and chips), often deep-fried and served with generous amounts of salt and vinegar. Other favorites include the “Cowboy Supper,” where chips are topped with sausages and baked beans—though this combination might not be for everyone!

Pastie Supper: A Deep-Fried Delight

The pastie supper is another beloved Northern Irish dish, made by deep-frying a spiced minced pork, onion, and potato pie. Unlike Cornish pasties, which are baked, the Northern Irish version is entirely deep-fried, adding a crispy texture that makes it truly unique. It’s so iconic that even local sculptures celebrate the pastie supper.

Pub Grub: Comfort Food with a Twist

Pubs in Northern Ireland serve up more than just drinks. Pub grub is a term used for the traditional meals offered at these local watering holes. From hearty stews to international dishes like lasagna, pub menus offer a variety of comfort food. One standout dish is Ulster Irish Stew, a lamb-based stew often served with potatoes and onions.

Surf and Turf: A Perfect Combination

For those who prefer both land and sea, surf-and-turf is the perfect compromise. In Northern Ireland, this often means battered prawns (scampi) from local fishing towns like Portavogie, paired with a steak or beef from nearby farms. This combination of seafood and beef is a popular option at pubs and restaurants across the region.

Steak and Guinness Pie: A Pub Favorite

A true British and Irish classic, the Steak and Guinness Pie is a must-try. Tender chunks of beef are slow-cooked in a rich Guinness sauce and topped with a flaky pastry shell. It’s comfort food at its finest, though you may also find versions where the Guinness is served separately, allowing you to enjoy the pie with a glass of the famous stout.

Potato Champ: A Hearty Side Dish

In Northern Ireland, potatoes are a staple, and the champ is a particularly beloved dish. This mashed potato concoction is made with butter, milk, and scallions, often served as a side dish to accompany other meals. While simple, it’s a delicious and comforting choice.

The Carvery: A Traditional Sunday Meal

The carvery is a classic Northern Irish meal, often served in pubs or restaurants as a Sunday dinner. This buffet-style service allows you to choose from a variety of meats, vegetables, and potatoes, all served with generous portions of gravy. It’s a quick and satisfying meal, perfect for feeding a crowd.

Sweets and Snacks: Sweet Treats of Northern Ireland

Northern Ireland isn’t just about hearty savory meals; it also has its fair share of sweet treats. Traybakes are one of the most popular snacks, offering a variety of cake-like desserts that are baked in large trays and served in individual portions. One standout sweet is the Jammy Joey, a moist Madeira sponge cake covered in jam and coconut.

Yellowman: A Sweet, Crunchy Treat

Yellowman is a local honeycomb treat, similar to what you might find inside a Crunchie bar. It’s a crunchy, sweet delight that melts in your mouth. In addition to being a tasty snack, it’s also used in a local cocktail that pairs it with ginger ale and Bushmills whiskey—a perfect way to enjoy this treat.

Tayto Crisps: A Local Favorite

No trip to Northern Ireland is complete without sampling Tayto crisps. Known for their iconic flavors, including Cheese and Onion, Tayto crisps are a favorite snack for locals. Whether you’re grabbing a bag at the airport or from a vending machine, these crisps are a must-try snack.

Bushmills Whiskey: A Local Distillery Favorite

For lovers of whiskey, Bushmills is the go-to distillery in Northern Ireland. Known for its smooth, triple-distilled whiskey, Bushmills offers tours where you can sample their products and learn about the distilling process. It’s a great way to experience the local culture and enjoy a glass of the region’s finest whiskey.

Local Beers and Buckfast Wine

Northern Ireland also has a growing craft beer scene, with local brews like Belfast Ale and Belfast Lager gaining popularity. If you’re looking for something a little different, you might want to try Buckfast Wine, a tonic wine that’s gained a cult following in the region.

Conclusion

From hearty breakfasts to indulgent chip shop meals, Northern Irish food is all about comfort, simplicity, and flavor. While it may not always be the healthiest option, it’s certainly one of the most satisfying. If you’re planning a visit, be sure to explore these essential dishes for a true taste of Northern Ireland.

If you’re in search of a challenging yet rewarding hike in Washington, Mount Townsend offers one of the most beautiful and less crowded routes in the Olympic Peninsula. Known for its impressive 360º views, this summit overlooks the Olympic Mountains, Mt. Rainier, the Hood Canal, and even stretches to Canada. With several routes leading to the peak, the Little Quilcene River trail offers a less-traveled, more demanding alternative that guarantees a solid workout and spectacular vistas.

Hike Overview

  • Distance: 6.8 miles
  • Elevation Gain: 2,200 feet
  • Difficulty: Moderate to Difficult
  • Area: Olympic Peninsula
  • Permits: None required

Mount Townsend is one of those hikes that tests your stamina, especially if you’re taking the Little Quilcene River trail. This lesser-known path, starting from the Tubal Cain trailhead, gives hikers a chance to enjoy nature with fewer crowds. Although the climb can be relentless, with a constant incline for the first two miles, the payoff is worth every step.

The Hike

The Little Quilcene River trail starts with an uphill climb through the forest, and from the beginning, you’ll feel the intensity. The trail is steep, with no easy sections to give you a breather. Along the way, however, you’ll be treated to occasional glimpses of the beauty around you, especially when you start to near the summit.

After about two miles, the trail forks, with Mount Townsend waiting on the left. From here, the landscape opens up, offering breathtaking panoramic views of the surrounding Olympic Mountains and the Hood Canal. As you continue for the next 1.4 miles, the trail becomes more exposed, and the view grows even more majestic. It feels as if you’ve stepped into a scene from the Sound of Music—wide-open spaces and lush landscapes begging for a celebratory spin with arms wide open.

Getting There

The trailhead can be accessed from Quilcene, a small town off Highway 101. Alternatively, if you’re coming from Sequim, you’ll take a more rugged road, FS 2909 and FS 2820, which may have some potholes, but is passable with care. The drive from Sequim is a bit longer, around an hour, while from Quilcene it’s shorter, taking about 35 minutes via FS 2820.

  • Trailhead Coordinates: 47.8866, -123.0419

From Seattle

To reach the trailhead from Seattle, you can drive around through Tacoma or take the ferry for a more scenic approach. The ferry ride from Edmonds/Kingston or Seattle/Bainbridge costs around $20 each way, and it’s essential to check the ferry schedules ahead of time. If you’re driving, be mindful of construction delays on the Peninsula, especially near the Hood Canal Bridge.

Once you’re on the Olympic Peninsula, the drive is quite picturesque. The winding forest roads and views of vibrant farmland with wildflowers add to the charm. Don’t forget to make a pit stop if you spot a field of cows—it might delay your ferry but trust me, it’s worth the detour.

What to Bring

This hike is straightforward but it’s important to come prepared:

  • Down jacket: The summit of Mount Townsend can be cold and windy, so a down jacket is essential for staying warm at the top.
  • Trekking poles: These aren’t necessary, but they can be useful, especially on the descent to help with knee strain.
  • First-aid kit & headlamp: Always pack these items for safety.
  • Water & Snacks: Hydration is key, and snacks to keep your energy up are always helpful.
  • Beer: After such a challenging hike, cracking open a cold one at the summit is a well-earned treat.

Last-Minute Tips

  • Dogs: Mount Townsend is dog-friendly, so feel free to bring your pup along if they’re up for the challenge.
  • Post-hike refreshment: After your hike, if you’re waiting for the ferry, stop by Bainbridge Brewing Alehouse or, if in Kingston, try Downpour Brewing or the Kingston Ale House for a cold beer.

Final Thoughts

The hike up Mount Townsend via Little Quilcene River is a fantastic adventure that rewards you with stunning views, a great physical challenge, and a sense of accomplishment. Whether you go for the solitude or just want a new perspective of the Olympic Peninsula, this trail offers everything you could want in a hike. So grab your gear, hit the trail, and prepare for an unforgettable experience!

Malaysia is a food paradise, where you can taste the perfect blend of Malay, Chinese, and Indian influences. With a rich history of diverse cultures, the local food scene reflects this unique mix. If you’re planning a trip to this vibrant country, make sure to explore these essential dishes and experiences that define Malaysian cuisine.

Nasi Campur

A classic dish you’ll find at food courts across Malaysia, Nasi Campur (which means “mixed rice”) is a must-try. It consists of a plate of rice with a variety of pre-cooked dishes and sides you can pick from a buffet-style setup. Each region offers its own twist on Nasi Campur, with Nasi Kandar (Indian-inspired) popular in the north and Nasi Padang (Malay and Indonesian-inspired) favored in the south. This is an easy and inexpensive way to get a taste of the country’s culinary variety.

Fish Head Curry

Fish Head Curry is a bold and spicy dish that has earned its place as one of Malaysia’s iconic offerings. While it’s believed to have originated in Singapore, this dish is a staple in Malaysia as well, especially at Nasi Kandar restaurants. Made with red snapper’s head, vegetables, and a rich South Indian-style curry, it’s a flavorful, fiery treat. This dish is the result of an Indian chef’s attempt to cater to Chinese tastes, making it a unique fusion of cultures.

Beef Rendang

Though originally from Indonesia, Beef Rendang is a beloved dish in Malaysia. The beef is slow-cooked in coconut milk and a spice paste made of ginger, turmeric, and chilies. The long cooking process ensures the beef becomes tender and the sauce thickens into a rich, caramelized perfection. Rendang is a staple at Nasi Campur buffets, and it’s the kind of dish that shows the depth of Malaysian culinary techniques.

Nasi Lemak

Nasi Lemak is often regarded as Malaysia’s national dish. It’s a simple yet flavorful meal that consists of coconut milk-infused rice, crispy fried anchovies, peanuts, and a spicy sambal sauce. This dish is traditionally eaten for breakfast but can be found all day long. Served wrapped in banana leaves, it’s especially delicious when paired with fried or grilled chicken, making it a satisfying meal any time.

Char Kway Teow

Char Kway Teow, often compared to Thailand’s Pad Thai, is a stir-fried noodle dish made with flat rice noodles, eggs, prawns, and bean sprouts. Stir-fried in soy sauce, this dish is simple but packed with flavor. It’s a common dish across Malaysia and can be found in street food stalls and restaurants. The ingredients may vary regionally, with some places adding cockles or fish cakes to the mix.

Mee Goreng

Mee Goreng is a fried noodle dish often served in food courts and hawker stalls throughout Malaysia. While similar to Char Kway Teow, it uses egg noodles instead of flat rice noodles. Mee Goreng can be made with various proteins, including chicken, beef, or prawns, and is typically stir-fried with vegetables and chili paste. It’s a quick, filling meal, but not as exciting as other dishes on this list.

Curry Mee

Curry Mee is a spicy noodle soup made with egg noodles and a coconut-based curry broth. This dish includes fried tofu and beansprouts, with the option of adding congealed blood cubes for extra texture. It’s similar to the Thai dish Khao Soi but with a more Indian-inspired flavor profile. Curry Mee is widely available and is a favorite among curry lovers.

Chicken Satay

Satay is a beloved barbecue dish in Malaysia, featuring marinated pieces of chicken skewered and grilled over open flames. It’s served with a peanut sauce that can vary in spiciness depending on the region. The best versions of Satay often come from Indonesia, but Malaysia puts its own spin on the dish, especially with chicken wings as an increasingly popular variation.

Loh Mee

Loh Mee is a Penang specialty made with thick egg noodles in a gooey, egg-based broth. This dish is complemented by crispy pork pieces, fried pork skin, and crunchy beansprouts, and often topped with a boiled egg. Loh Mee is a great choice if you’re in Penang, as it’s one of the area’s most beloved noodle dishes.

Hokkien Mee

Originating from the Chinese Hokkien province, Hokkien Mee is a stir-fried noodle dish that’s particularly popular in Kuala Lumpur. The noodles are stir-fried with pork lard, pork, prawns, and dark soy sauce, creating a rich and flavorful dish. It’s typically served with lime, chili, and sambal for extra kick.

Wonton Mee

Wonton Mee is a Chinese-inspired dish that consists of egg noodles served with dumplings filled with ground pork and shrimp. The noodles are often cooked in soy sauce and accompanied by Chinese broccoli. Wonton Mee is a favorite at many food stalls and can be served in soup or as a dry dish with soup on the side.

Butter Prawns

Butter Prawns is a modern Malaysian dish that blends Chinese, Malay, and Indian cooking techniques. The prawns are cooked in a rich sauce made with butter, egg, coconut milk, and curry leaves, resulting in a creamy, spicy dish. There are two variations: the wet version, with a saucy consistency, and the dry version, which is covered in crispy egg floss.

Claypot Chicken Rice

Claypot Chicken Rice is a comforting dish that’s cooked and served in a traditional clay pot. The rice is slow-cooked with stock and chicken, creating a crispy bottom layer and a smoky flavor. This simple yet delicious dish is a great choice for those looking for a warm, satisfying meal.

Biryani Rice

Biryani is a fragrant rice dish that’s popular in Malaysia’s Mamak restaurants. The rice is cooked with spices like cardamom and chili powder, and layered with yogurt for extra flavor. Often served with mutton curry or tandoori chicken, Biryani is a hearty meal that’s perfect for a special occasion.

Roti Canai

Roti Canai is a popular flatbread that originated in India but is now a staple in Malaysia. It’s a simple, pan-fried bread that’s served with curry sauce or various meat curries. Variations like Murtabak (stuffed Roti) and Kotthu (Roti mixed with meat and egg) add exciting twists to this humble dish.

Tandoori Chicken

Tandoori Chicken is a dish that’s made in a traditional clay oven called a tandoor. The chicken is marinated overnight in a mixture of spices and yogurt, then grilled in the tandoor to achieve a perfectly tender interior and crispy exterior. It’s a must-try for anyone visiting Malaysia.

Samosas

Samosas are deep-fried pastries filled with spiced potatoes, meat, or vegetables. These tasty snacks are commonly found in Indian-influenced areas of Malaysia, especially in food courts or at curry puff stands. They make for a quick and satisfying snack, perfect for eating on the go.

Steamboat Hot Pots

Steamboat, or Hot Pot, is a communal dining experience that was introduced by Chinese traders in Malaysia. Guests cook their own meats, vegetables, and noodles in a simmering broth, choosing from a variety of flavorful options like Malay Soto, Thai Tom Yum, or spicy Sichuan. It’s a fun, interactive way to enjoy a meal with friends.

Lok Lok Hot Pot

Lok Lok is a street food variation of Hot Pot, where skewered meats and vegetables are dunked into a hot broth for a quick cook. It’s a fast, casual way to enjoy the flavors of Hot Pot and is often served with a variety of spicy dips and sauces.

Rojak

Rojak is a fruit and vegetable salad tossed in a sweet, sour, and spicy chili and tamarind dressing. The fruits used vary by season and region, but common ingredients include water apple, pineapple, and mango. A similar dish, Pasembur, is an Indian-inspired version with deep-fried vegetables and a sweet, spicy sauce.

Ais Kacang

Ais Kacang is Malaysia’s version of a shaved ice dessert. It’s a refreshing treat made with layers of shaved ice, fruits, beans, and syrups. It’s a popular choice for a cool, sweet finish to a meal and can be found at food courts and dessert stands throughout the country.

Durian

Durian is Malaysia’s famous “King of Fruits,” known for its strong smell and divisive taste. Some people love its creamy, sweet flesh, while others find it overpowering. Durian is typically available from June to October, and trying it is a quintessential Malaysian experience.

Extra Strong Beer

In Malaysia, alcohol is heavily taxed, but you can still find strong beers with high alcohol content. The local Carlsberg Special Brew is 8.8% ABV, but many beers, including Guinness, have higher alcohol content here compared to other countries. If you’re a fan of strong drinks, this is something to explore.

Fruit Juices and Teh Tarik

For those avoiding alcohol, Malaysia’s fresh fruit juices are an excellent alternative. Lychee juice and salted mango lassi are my personal favorites. Teh Tarik, a frothy tea made with black tea and condensed milk, is another daily staple in Malaysia. It’s often enjoyed at Mamak restaurants alongside meals.

Malaysian cuisine offers an incredible variety of dishes influenced by a diverse cultural landscape. Whether you’re savoring a rich beef rendang or cooling down with Ais Kacang, the food here is a reflection of the country’s vibrant and delicious heritage.

When it comes to sausages, I know my stuff. While I haven’t tried every single one in Chiang Mai, I can confidently say that the best Sai Oua (Northern Thai Sausage) in the city can be found at Mae Hia Fresh Market, also known as Talad Sod Mae Hai. It’s a subjective choice, of course, but based on local recommendations, the long queues, and the daily volume of sausages they grill up, this place is tough to beat.

Mae Hia Fresh Market

The stall at Mae Hia Market, or what could be better described as a mini kitchen, is called Gao Makham (which translates to “under the tamarind tree”). It’s a bit tricky for those who don’t read Thai, but if you’re looking for it, just head to the corner of the market near the road where you’ll spot long queues waiting for their turn. This is where they grill up the Sai Oua sausages so fresh and crumbly that they fall apart when poked with a stick.

Finding Gao Makham

Unlike hawker stalls in places like Singapore or Malaysia, Thai people aren’t typically fond of waiting in long lines unless they’re in air-conditioned comfort. However, to find Gao Makham, you need to look for the queues. There’s another similar stall called Sai Oua Samonprai (which means “herbal sausage”) across the market, and while it’s also a top contender for the best sausage, Gao Makham remains a favorite.

Herbal Goodness

Both stalls serve sausages that are packed with herbal flavors, and when I say herbal, I mean the best-known Thai flavors: lemongrass, kaffir lime leaves, chillies, and galangal. This combination gives the sausages a wonderful sour, spicy kick, similar to the flavors you’ll find in Isaan dishes like prik kaeng (a Thai spice mix). This balance of heat and fragrance makes the sausages truly stand out.

Lanna Favorites at Mae Hia Market

While the journey to Mae Hia Market might seem like a trek, it’s definitely worth it, especially if you’re a fan of Lanna cuisine. Beyond the sausages, this market is a treasure trove of Northern Thai favorites. When we’re traveling further afield, Mae Hia Market is our go-to spot for road trip snacks. We pick up staples like kap moo (crispy pork skin), nam prik noom (grilled green chili dip), and naem mok (steamed fermented pork), all served with sticky rice. There are also heartier dishes like kaeng hang leh (fruity pork curry), nam niao (tomato curry), and the famous Khao Soi (Burmese curry noodle soup).

Food on the Go

The great thing about Mae Hia Market is that most of the food is sold to-go, making it perfect for road trips. We often grab our snacks and eat in the car—though eating in the car comes with its own set of risks, like avoiding the 5,000 baht fine for eating in certain areas. But it’s worth it when you get to enjoy these delicious treats. On our last trip, we were accompanied by a Vietnamese friend who had been hesitant about Thai food until she tried Sai Oua. The flavor was so good, it broke down her food snobbery. By the end of the trip, she couldn’t get enough and even became a fan of Khao Soi. Who knows? She’s now thinking about moving to Chiang Mai!

When you’re out on the trail, packing the right gear can make or break your experience. One essential item that can help keep things organized is the infamous “ditty bag.” If you’re not familiar with it, a ditty bag is simply a small, practical bag that holds all the little things you need while backpacking. It’s where you store those items that could easily get lost in the bottom of your pack but are crucial to your survival and comfort.

In this post, I’ll walk you through the contents of my ditty bag and explain why each item is vital to my hiking and backpacking setup. From first aid essentials to toiletries and repair kits, this bag covers all the bases for my outdoor adventures.

What’s in My Ditty Bag?

The contents of my ditty bag are a blend of essential items for maintaining my health and well-being, staying clean, and keeping my gear in working order. While some items are kept inside the bag, others, like my potty kit, are kept in separate compartments or on the outside of my pack for quick access.

First Aid & Toiletries

When you’re hiking, you need a first aid kit that’s both compact and effective. I prefer to keep mine lightweight, so I don’t carry everything under the sun. Instead, I bring the essential items I might need to handle minor injuries or issues until I can reach help or evacuate.

First Aid Kit:

  • Pain Relief: A small pill bottle containing Ibuprofen (800mg per dose), Benadryl (1 per day), Immodium (1 per day), Aspirin, and my personal prescription meds.
  • Alcohol Swabs: 2-3 swabs for cleaning wounds.
  • Gauze: 2-4 squares for dressing wounds.
  • Triple Antibiotic Ointment: For cuts and scrapes.
  • Burn Relief Gel: In case of burns.
  • Bandaids: Just a couple for minor cuts.
  • Leukotape: This tape is an absolute game-changer, offering a strong adhesive that helps prevent blisters and keeps bandages secure.
  • Vagisil: A surprising but effective solution for preventing and healing chafing.
  • Tweezers: For removing splinters, stingers, or ticks.
  • Hand Sanitizer: Always a must for hygiene on the trail.
  • Bandana: It can be used for various things, from wiping your face to acting as a makeshift tourniquet in an emergency.
  • Garmin inReach Mini: A satellite communicator for emergencies if self-evacuation fails.

Toiletries:

While some of these items might seem like luxuries, they make a significant difference in your comfort on the trail, especially on longer trips.

  • Sunscreen: Always SPF 30 or higher, plus an SPF lip balm.
  • Eyedrops: Great for dry eyes and flushing out debris.
  • Bug Spray: I prefer Picaridin because it’s effective against ticks and mosquitoes without damaging gear like DEET does.
  • Body Wipes: An easy way to clean yourself, especially when water is scarce or too far away. Helps prevent chafing.
  • Toothbrush & Toothpaste: Always travel-sized to save weight.
  • Floss: It’s great for personal hygiene, and you can also use it for gear repair.
  • Mini Nail Clippers: Keep those toenails in check to avoid discomfort.

Repair Kit

Even with the best gear, accidents can happen, and your equipment might need a quick fix. My repair kit is lightweight and focused on handling small repairs for my most crucial gear.

  • Tenacious Tape: Essential for patching holes in tents, jackets, or sleeping pads. It’s perfect for silnylon and DCF (Dyneema) tents.
  • Inflatable Sleeping Pad Repair Kit: Includes patches and an alcohol swab for quick fixes on the trail.
  • Needle & Floss: Use them for mending gear or even dealing with large blisters.
  • Safety Pin: Can be a lifesaver in a pinch for fabric repairs.
  • Duct Tape: Wrapped around my trekking pole, it’s a versatile repair material for various emergencies.
  • Knife: For cutting tape, cordage, or even fabric, it’s a handy tool to have on hand.
  • Bandana: In addition to being a multi-purpose item, it can also help if your gear gets damaged. For example, if your backpack strap gets chewed up, you can use the bandana as a makeshift repair.

Together, these items weigh less than a pound and are stored in a compact DCF roll-top dry bag to keep them dry. The inReach Mini, bandana, and hand sanitizer hang on the outside of my pack for easy access.

Potty Kit

When nature calls, you want to make sure you’ve got the right tools to take care of business in the backcountry. My potty kit is simple, but it’s designed to follow Leave No Trace principles and make things as easy as possible.

  • Trowel: I use the ultra-light Deuce of Spades trowel for digging a cat hole.
  • Toilet Paper: I pack around 6 squares per day and use natural materials like leaves or stones for the first few wipes when possible.
  • Ziplock Bags: One for clean toilet paper and another for used TP.
  • Kula Cloth: My favorite pee rag! It’s great for reducing waste and keeping things clean.
  • Hand Sanitizer: Always a must after the bathroom, and body wipes come in handy for extra cleanliness.

This setup may seem like a lot to carry, but it’s all about being prepared. Having a well-packed ditty bag ensures you’re ready for just about anything the wilderness throws your way. And while not all of this gear is strictly necessary for every hike, it’s a lifesaver when you’re miles from civilization, dealing with unexpected situations.

Salar de Uyuni, located in the heart of Bolivia, is one of the most remarkable destinations in South America. From the vast salt flats to its surreal landscapes, including colorful lagoons and towering volcanoes, there’s no shortage of jaw-dropping views. While many visitors choose to explore this region via guided tours, it’s entirely possible to experience Uyuni on your own terms, at your own pace.

In this guide, I’ll share essential tips and things to know before embarking on your Salar de Uyuni adventure, whether you’re considering a tour or going independent.

1. Choose Your Starting Point: Uyuni or Tupiza

You can begin your Salar de Uyuni journey from either Uyuni or Tupiza, two towns located near the salt flats. If you’re coming from Argentina, Tupiza is a great option since it offers fewer tourists and smaller agencies. From Tupiza, the tours tend to last four days. On the other hand, Uyuni offers more flexibility, with 1, 2, 3, or 4-day tours, and many agencies to choose from. If you’re heading to Chile afterward, some tours from Uyuni can drop you off in San Pedro de Atacama for a small extra fee.

2. A 1-Day Tour Might Be Enough

While the multi-day tours are popular, they’re not the only option. If you’ve already visited other parts of South America with similar landscapes, a one-day tour may be all you need. Many travelers opt for the longer trips, but don’t feel pressured to follow the crowd if a shorter option suits you better.

3. Bargain for the Best Price

Most tour operators are open to negotiation, so don’t settle for the first price you’re offered. During my experience with Esmeralda Tours, members of our group paid anywhere from 700B to 870B, depending on their negotiation skills. If you’re traveling with a group, you’ll likely have more leverage to lower the cost.

Pro Tip: Ask the operator if they can include a sleeping bag in the price, as temperatures at night can drop significantly!

4. Pack Essentials: Toilet Paper, Snacks, and Water

Don’t forget to bring your own toilet paper, as most accommodations along the tour won’t provide it. Also, be aware that park entry fees, bathroom use, and hot showers are typically not included in the tour cost, so you may need extra cash on hand. Snacks and plenty of water are also essential as the remote areas offer limited access to supplies.

5. Be Prepared for Spanish

Most tours are conducted in Spanish, so unless you’re fluent, it’s helpful to learn some basic phrases or rely on fellow travelers who can assist with translations. If you want to ensure an English-speaking guide, you might need to book a private tour, which could be pricier but tailored to your preferences.

6. Acclimate to the Altitude

The high-altitude landscapes of Uyuni can be a challenge, especially if you haven’t had time to acclimate. Though the majority of the tour is by vehicle, the altitude can still affect your energy levels. Make sure to stay hydrated, and if you’re feeling unwell, ask your guide for coca leaves or tea to ease symptoms. Some travelers opt to bring altitude sickness tablets just in case.

7. Experience the Starry Sky

One of the most unforgettable moments in Uyuni is the starlit sky. Despite the freezing temperatures, I made sure to step outside on the second night to witness a dazzling display of stars that looked like shimmering fireflies. If you’re an astronomy enthusiast or just appreciate the beauty of the night sky, make sure you get outside for this incredible experience.

8. Get Creative with Photos

Salar de Uyuni is the perfect place for creative and fun photos. With its vast, open salt flats, you’ll have ample opportunities to capture playful perspective shots that are sure to entertain. Set aside an hour or two for this activity, as everyone enjoys creating these lighthearted photos.

9. Charge Up Your Devices

Many of the accommodations along the tour are basic, and charging facilities can be scarce. I was lucky to have fellow travelers with backup chargers when my phone battery ran out. Bring your own portable charger to avoid missing out on capturing those unforgettable moments.

10. Catch a Tour Upon Arrival

If you’re coming in on an overnight bus from La Paz, you’ll likely arrive in Uyuni early in the morning. This gives you plenty of time to find a tour operator and join a tour by around 10:30 a.m. If you prefer to rest for a night before the tour, there are quirky and unique accommodations to consider, such as Onkel Inn Wagon Sleepbox or Casa Andina Salt Hotel, which offer memorable stays and great amenities.

11. Layer Your Clothing

The temperature in Uyuni can vary dramatically, especially if you’re visiting during colder months. I went in late September, and it was freezing at night, requiring layers like alpaca socks and gloves. Be prepared for cold nights, especially since most accommodations are basic and won’t have heating.

12. Plan Your Arrival

Getting to Uyuni is easy with bus connections from major cities like La Paz. A bus ride from La Paz costs around 130B and can be chilly, so pack warm clothing. Alternatively, there are flights to Uyuni from other Bolivian cities with Amaszonas and Boliviana, but be sure to book early, as flights can fill up quickly.

Final Thoughts

Whether you decide to explore Salar de Uyuni on a guided tour or on your own, this otherworldly destination is sure to leave you in awe. With its salt flats, surreal lagoons, and unique landscapes, the experience is bound to be one of the highlights of your trip to Bolivia. Just remember to plan ahead, pack wisely, and enjoy the adventure!

In today’s digital age, technology plays a significant role in backpacking, making outdoor adventures easier, safer, and more enjoyable. During my 2018 Pacific Crest Trail (PCT) thru-hike, I relied on various electronic devices that helped me navigate, stay connected, and document my journey. Although new models and improved gear are available today, my experience can still offer valuable insights into how technology can enhance your backpacking experience.

The Basics of My Hiking Tech

For my PCT hike, I carried a combination of devices that ensured I was prepared for anything the trail threw at me. The key was to find a balance between functionality, weight, and battery life. Here’s a breakdown of the tech I used:

iPhone 8 Plus

The iPhone 8 Plus was my go-to device for several reasons. With its dual-camera system featuring wide-angle and telephoto lenses, it allowed me to capture stunning photos along the trail. I chose this phone before my hike because of its increased storage and improved camera capabilities, which helped me document the journey without worrying about uploading photos during the hike.

I used my iPhone for various purposes, including:

  • Photography and video: Capturing moments on the trail.
  • Navigation: Accessing maps and trail guides.
  • Entertainment: Listening to podcasts and music during longer stretches of the hike.
  • Emergency flashlight: Always having a backup light source.
  • Research: Checking trail conditions and weather updates when I had a signal.
  • Communication: Staying in touch with family and friends back home.

To conserve battery, I kept the phone on Airplane Mode and Low Power Mode whenever possible.

FarOut Guides (formerly Guthook)

FarOut Guides is an app specifically designed for thru-hikers, and it was a lifesaver during my PCT hike. The app combines topographical maps, navigation, and a trail guide, showing everything from water sources to campsites and trail hazards. One of the best features of FarOut is its elevation profile, which helps hikers understand the terrain they’re about to encounter.

It also offers a user-generated comment system, so you can get updates from other hikers, making it a fantastic tool for keeping track of trail conditions and closures. While I couldn’t rely on it for everything, it was one of the most crucial apps I used on the trail, especially for navigation.

Garmin inReach

The Garmin inReach was arguably the most critical piece of technology I carried. This satellite communicator allowed me to send and receive messages when there was no cell service, which helped me stay in touch with my family. Each night, I sent a check-in message to my parents, giving them peace of mind.

The inReach’s SOS button was another essential feature, offering a direct line to search and rescue in case of an emergency. I also relied on its weather feature when in the remote areas of Washington, where weather forecasts for nearby towns didn’t always match conditions in the mountains.

Since the Garmin inReach Mini has since been released, I would recommend any Garmin inReach model for backcountry communication during long hikes like the PCT.

Anker PowerCore II 20,000 mAh

Having a reliable power bank is crucial for multi-day hikes where you rely on electronics for navigation, communication, and even entertainment. I chose the Anker PowerCore II 20,000 mAh after thorough research and direct communication with Anker’s customer service. This power bank had the capacity to keep my devices charged, even when I needed to charge my phone and headlamp daily.

I paired it with a quick-charging wall charger, and it took about 5 hours to fully charge the battery. The weight was manageable, and the power bank lasted around 9 days when charging my iPhone and other devices. Since tech advancements continue rapidly, newer power banks now hold even more power while maintaining the same size and charging faster. If you’re planning a hike, I recommend checking out Anker’s latest models.

Striking the Right Balance with Technology

While technology certainly makes backpacking more efficient, it’s important to strike a balance between staying connected and fully experiencing the outdoors. Some hikers prefer minimal tech, while others embrace a more tech-savvy approach, as I did. For my PCT hike, having the right gadgets helped me navigate, stay safe, and capture the essence of my journey.

Although I also carried a mirrorless camera, I found myself questioning if it was worth the extra weight on such a long hike. Going forward, I may rely more on my smartphone for photos and leave the extra camera behind, especially if I’m aiming for a lighter load.

Whether you’re hiking the PCT, or just embarking on a shorter backpacking adventure, incorporating the right technology can elevate your experience, but make sure not to over-pack. You’ll want to make sure that your gear is both functional and manageable, allowing you to focus on the adventure itself.