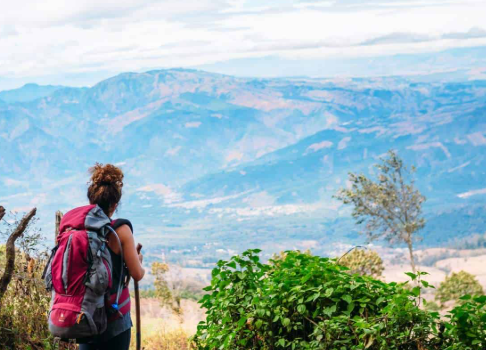
Huaraz, the trekking capital of Peru, offers an incredible variety of hiking experiences that attract adventurers from all over the world. Whether you’re planning a quick day hike or a multi-day trek, this region in the Cordillera Blanca promises everything from snow-capped mountains and crystal-clear lakes to unique Andean villages. Whether you’re an experienced trekker or a beginner, there’s something for everyone.

Perched high in the Andes, Huaraz is home to some of the most scenic trails, with altitude being one of the challenges to consider. To make the most of your adventure, it’s essential to acclimatize, but luckily, there are shorter hikes perfect for getting used to the altitude before tackling longer treks like the Santa Cruz trail.

Here are some of the top hiking spots around Huaraz:

1. Wilkacocha

If you’re new to hiking or just looking for an easy introduction to the region, the Wilkacocha trail is an excellent choice. It’s a short hike, around 2 hours up and 1 hour down, offering panoramic views of the Cordillera Blanca mountains. This trail is ideal for acclimatization, and as it’s easily accessible from Huaraz, it’s perfect for a quick adventure.

On the way, you’ll pass by traditional Andean villages, adding a cultural element to the hike. It’s also free to do, aside from the cost of taking a collectivo, making it a budget-friendly option.

2. Laguna 69

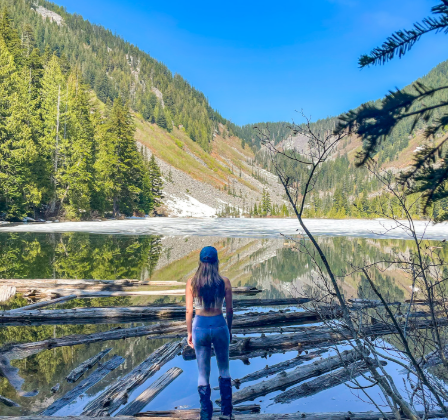
For a slightly more challenging trek, Laguna 69 is a must-do. This beautiful turquoise lake sits at an altitude of 4,650 meters and is surrounded by towering mountains. The hike takes about 3 hours to reach the lake, and around 2 hours to descend.

While you can hike to Laguna 69 independently, many opt for the affordable tour buses that cost around 25-30 soles, which drop you off at the trailhead. Just remember, the hike itself is done on your own. If you’re lucky with the weather, the stunning views and vibrant waters make it all worth the effort. Just be mindful of the altitude—it’s best to acclimatize before attempting this hike.

3. Laguna Churup

Laguna Churup is one of the lesser crowded trails in the area but still offers a great adventure. The trail is about 2 hours up and 1.5 hours down, and it’s an excellent option for those who want to acclimatize and enjoy nature without venturing too far into more strenuous terrain.

The hike begins at the town of Pitec, with a daily collectivo leaving Huaraz at 7:30 am. You’ll need to pay an entry fee to the national park, but once you’re on the trail, the scenery will make it all worthwhile. The climb can be challenging, but the view of the turquoise lagoon surrounded by mountains is one you won’t forget.

4. Laguna Paron

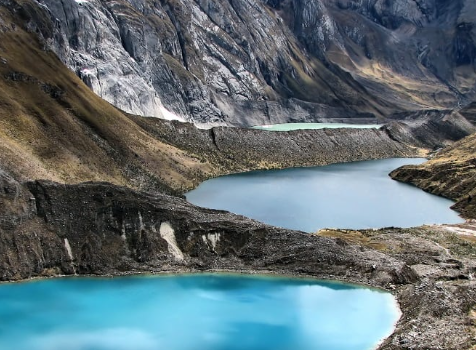
For those looking for a shorter but still scenic hike, Laguna Paron is a great option. The largest lake in the Cordillera Blanca, Laguna Paron sits at an altitude of 4,150 meters. While the hike itself is a bit easier than some of the other trails, you still get stunning views and a chance to enjoy the beauty of the mountains.

You’ll have the option to walk around the lake or take in the views from a mirador (viewpoint) that involves climbing over jagged rocks. The tour to the lake costs around 47 soles plus a 5-sol entry fee to the park. It’s a great spot to spend a day, especially for those short on time but still wanting to enjoy the incredible scenery.

5. Pastoruri Glacier

Located in the southern part of the Cordillera Blanca within Huascarán National Park, Pastoruri Glacier is a unique destination. It’s not only a glacier but also a place to witness the effects of climate change firsthand. A climate expert on my tour explained that the glacier has shrunk by more than 20% in the last 30 years.

Visiting Pastoruri offers a chance to walk on the glacier and take in the surrounding landscapes. Tours can be arranged from Huaraz for about 30 soles, and it’s a great opportunity to learn about the region’s rapidly changing climate.

6. Other Notable Hikes

If you’re looking for more trekking options, Huaraz has a wide range of trails to explore. Some of the most popular options include:

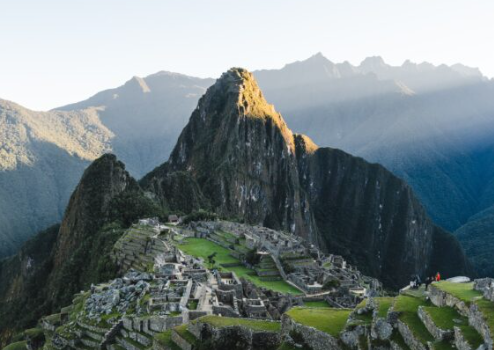
  • Santa Cruz Trek: A multi-day trek offering incredible views of the mountains, this is one of Peru’s most famous hikes.
  • Laguna Shallap: A beautiful high-altitude lake that’s perfect for a scenic trek.
  • Laguna Rajucolta: A quieter trail with stunning views of the surrounding peaks.
  • Lagunas de Llangunco: A lesser-known, peaceful spot ideal for nature lovers.
  • Laguna Uruscocha: A serene lake in the mountains that’s perfect for a peaceful retreat.
  • Laguna Llaca: Another hidden gem for those looking to escape the crowds.

Where to Stay in Huaraz

Huaraz is a bustling city with plenty of accommodation options, but it’s not exactly the quiet retreat I initially imagined. Depending on your budget, you can find a range of places to stay:

  • Casa de Ana: A great budget option, I stayed in a 3-person female dorm here for just 16 soles (£3.89). The hostel is slightly outside the city center but offers a great base for hiking trips.
  • Akilpo Guest House: A fantastic guest house located centrally in Huaraz, offering clean, comfortable, and spacious rooms.
  • The Lazy Dog Inn: If you’re looking for something more secluded, this mountain lodge is a great choice. It offers cozy rooms and spectacular mountain views, but be prepared for higher prices.

Final Thoughts

Huaraz is an incredible base for outdoor adventures. Whether you’re a beginner or an experienced trekker, you’ll find a trail that suits your level and provides stunning views of the Cordillera Blanca. From easier hikes like Wilkacocha to more challenging ones like Laguna 69 and the Santa Cruz Trek, there’s no shortage of options for hikers of all types. Be sure to acclimatize before tackling the high-altitude hikes, and don’t forget to bring plenty of water, snacks, and a camera to capture the stunning landscapes.

The Drakensberg Mountains in South Africa offer some of the country’s most awe-inspiring views and outdoor adventures. Whether you’re a hiking enthusiast or just a nature lover, this iconic range should definitely be on your list when traveling through South Africa. If you’re wondering how to experience this beautiful destination without breaking the bank, read on for my budget-friendly travel tips to the Drakensberg.

Getting to the Drakensberg Mountains

When it comes to budget-friendly options for getting to the Drakensberg, you have two primary choices: renting a car or using the Baz Bus service. Both are affordable, with a rental car offering more flexibility, while Baz Bus is a great choice for solo travelers looking to meet new people.

Renting a car is highly recommended for most visitors, as it gives you the freedom to explore at your own pace. While most roads are paved and accessible with any vehicle, you will need a 4×4 to reach the more remote areas of the mountains. If you don’t want to rent a 4×4, you can book a tour for those rougher stretches. We found that renting a regular car was a more economical option, and we could still take guided tours for the more challenging routes.

For those without a car, Baz Bus offers a convenient multi-stop service to the Drakensberg. This is particularly ideal for travelers who prefer not to drive but still want to visit popular sites along the way.

Where to Stay in the Drakensberg

Accommodation in the Drakensberg is varied, with budget-friendly hostels available in all areas. These hostels typically feature self-catering kitchens, so you can save on food by preparing your own meals. Many offer additional amenities like swimming pools and common areas for relaxation after a day of hiking.

  1. Northern Drakensberg
    • Where to Stay: Amphitheatre Backpackers Lodge
      • Cost: 295 Rand per night for a dorm ($17.50 USD)
      • This tranquil lodge is set in the heart of nature and is the perfect base for exploring the northern Drakensberg. The property features a fully equipped kitchen, a swimming pool, and plenty of outdoor activities.
    • Best Hike: Amphitheatre Hike in Royal Natal National Park
      • The Amphitheatre is one of the most stunning hikes in the Drakensberg. The trail is relatively easy, but the altitude can make it a bit challenging. If you prefer not to hike alone, guided tours are available for 750 Rand ($50 USD). Otherwise, a 4×4 vehicle is required to reach the starting point, and the park entrance fee is just 90 Rand ($5.50 USD).
      • A highlight of the hike is reaching the top of Tugela Falls, Africa’s highest waterfall. During the dry season, you can stand at the top of the falls, while during the wet season, the view of the cascading water is truly breathtaking.
  2. Central Drakensberg
    • Where to Stay: Cathedral Peak Hotel
      • Cost: Around $129 USD for a standard room
      • Located at the foot of Cathedral Peak, this hotel is a prime location for those looking to explore the central Drakensberg. It’s a little pricier than the hostels, but it’s worth considering for those wanting easy access to trails.
    • Best Hike: Cathedral Peak
      • The Cathedral Peak hike is a must-do if you’re in the central part of the mountains. You can pick up a self-guided map from the hotel, and the entrance fee is 40 Rand ($3 USD). For a shorter and less strenuous option, try the Rainbow Gorge Trail, a lovely 3-hour walk through a lush forest.
    • Historical Site: Giant’s Castle
      • For those more interested in history than hiking, Giant’s Castle is home to ancient cave paintings created by the San people. The site offers a fascinating glimpse into the region’s prehistoric past.
  3. Southern Drakensberg
    • Where to Stay: Sani Lodge Backpackers
      • Cost: 250 Rand per night for a dorm ($15 USD)
      • This cozy backpackers’ lodge is perfect for those visiting the southern Drakensberg. Surrounded by mountains, it’s a peaceful place to unwind after a day of hiking. The nearby Giant’s Cup Café offers meals and free Wi-Fi for guests.
    • Best Hike: Sani Pass
      • The famous Sani Pass hike is a highlight of the southern Drakensberg. The road leading into Lesotho is accessible by tour, and the views of the mountains are incredible. If you prefer a guided experience, a full-day tour can be booked at the lodge, and it’s considered one of the best value tours in the area.
    • Self-Guided Hikes: If you prefer to hike on your own, there are plenty of options starting directly from the lodge. The Stromness Plateau is an easy hike that rewards you with stunning views of the valley. Entrance fees for self-guided hikes are typically 45 Rand ($3 USD).

How Long Should You Stay?

A stay of 3 to 10 days in the Drakensberg will give you enough time to explore the main areas. If you’re short on time, focusing on one section of the mountains (North, South, or Central) is a great option. For a more in-depth experience, I recommend staying for about a week and making sure to prioritize the northern Drakensberg for its stunning views.

Additional Tips for Visiting the Drakensberg on a Budget

  • Self-Catering: Save money by shopping for groceries in nearby towns and preparing your own meals. Most hostels in the Drakensberg have fully equipped kitchens.
  • Guided Tours: While hiking on your own is possible for many trails, guided tours are a great way to learn more about the history and nature of the region. Prices for day tours range from 500-750 Rand ($30-$50 USD).
  • Travel Insurance: Don’t forget to purchase travel insurance before embarking on your trip, especially if you plan to hike in the mountains. I used Squaremouth Insurance, which provided affordable plans and reliable support.

Conclusion

Visiting the Drakensberg Mountains on a budget is entirely achievable, thanks to affordable accommodations, self-guided hikes, and budget transportation options. Whether you’re interested in hiking, exploring ancient caves, or simply soaking in the stunning views, the Drakensberg is an unforgettable destination that doesn’t require a luxury budget to experience fully. So pack your bags, hit the trails, and enjoy one of South Africa’s most remarkable natural wonders!

Chiang Mai may not have been at the top of my list as a “foodie” destination initially, as I was more drawn to the remote areas where the culinary influences of Myanmar, Laos, and Yunnan converge with northern Thai cuisine. However, during a recent visit, I found myself in the Nimman district of Chiang Mai, a vibrant area filled with street art, mountains in the backdrop, and a laid-back atmosphere that locals describe as “Chilled!” or “Ta Ton Yon!” To my surprise, Nimman turned out to be a food lover’s haven, with an exciting mix of flavors and a street food scene that blends perfectly with the area’s youthful and diverse vibe.

The Heart of Nimmanhemin Road

Chiang Mai is a major hub for both tourists and expats, and the Nimmanhemin Road area, often referred to as “Chiang Mai’s coffee street,” has become a central point for the city’s café culture. This area is still evolving into a full-fledged food scene, attracting a mix of locals, expats, and travelers. The variety of food here caters to diverse tastes, with an emphasis on dishes that remind the Asian crowd of home.

Nimman’s Café Culture: Where Whimsy Meets Coffee

One of the standout features of Nimman is the local ‘Fung-Fing’ culture, which shares some similarities with Japan’s obsession for ‘Kawaii.’ This culture revolves around cafés that are perfect for selfies, with many places offering cute, quirky décor. While coffee culture thrives here, I found myself captivated by the whimsical nature of Nimman’s café scene. A favorite in the area is Korean Bingsu, a shaved ice dessert that graces nearly every sweet menu. For dessert lovers, this treat — especially when paired with durian — is a must-try.

A Journey Through Asian Flavors

Every evening in Nimman feels like a culinary journey through Asia. From enjoying Okonomiyaki that transports me back to Osaka, to Sichuan Hot Pots that remind me of Chongqing, China, Nimman has a way of bringing these regional dishes to life, making them accessible even outside of their origins. The most prominent influence, however, is Mala, a Sichuan favorite that combines the heat of chili flakes and the numbing sensation of Sichuan peppercorns. Nimman is home to an entire strip dedicated to Chuan’r (Sichuan kebabs), where the meats are dusted with salt, chili flakes, cumin, and most importantly, Sichuan peppercorns, for that signature numbing spice.

Local Lanna Cuisine: The Heart of Nimman’s Flavors

Despite the wide array of international flavors, Lanna food will always reign supreme in Nimman. Local noodle stalls serve up northern Thai classics like Khao Soy, a coconut curry noodle soup, and Khanom Jeen, rice noodles served in a spicy Nam Ngiao tomato-based broth. If you’re looking for an authentic northern Thai experience, the Khantoke meal is a must. These meals are served tapas-style, with a variety of small dishes to share, including spicy Sai Oua sausage, Nam Prik Noom (a green chili dip), Nam Prik Ong (a minced pork and tomato dip), and a selection of boiled vegetables, pork scratchings, and rich Hang Ley pork curry to round out the meal. Dining in Nimman truly offers a perfect blend of traditional and contemporary flavors that will leave you craving more.

Conclusion

Chiang Mai’s Nimman district has emerged as a vibrant culinary hotspot, offering a unique mix of international flavors and authentic northern Thai cuisine. Whether you’re indulging in the fun café culture, diving into a hot pot, or savoring the bold spices of Lanna dishes, Nimman is a mecca for food lovers seeking both local and global food experiences. The diversity and richness of the flavors here make Nimman a must-visit for any food enthusiast.

With Raya just around the corner, many are starting to think about their travel plans to make the most of the long holiday. Whether you’re looking to explore nearby locations or venture farther afield, here’s a list of 10 incredible destinations that are perfect for celebrating Raya, categorized by trip duration.

Quick Getaways for 4 Days

If you’re looking for a short, relaxing break, these destinations are perfect for maximizing the long Raya weekend without taking too much time off work.

Chiang Mai, Thailand

If you want a laid-back escape that’s not as busy as Bangkok, Chiang Mai in northern Thailand is an ideal choice. Nestled in the mountains, this city is a foodie’s dream and offers a serene atmosphere perfect for a short Raya getaway. Visit the famous Wat Phra That Doi Suthep, a 14th-century temple perched on a mountain, and enjoy some delicious khao soi, a local coconut curry noodle dish. The relaxed pace of life and rich culture make Chiang Mai a great spot for rejuvenation.

Gili Islands, Indonesia

The Gili Islands, located off the coast of Lombok, Indonesia, are a haven for beach lovers and adventure seekers. Gili Trawangan is known for its lively atmosphere, perfect for those looking to unwind and party, while Gili Air offers a quieter, more peaceful experience for couples or anyone seeking tranquility. Enjoy snorkeling, diving, or a cooking class to learn local dishes. The islands are accessible by boat, and we recommend traveling light with a backpack for easier mobility.

Hanoi, Vietnam

For a cultural experience with a mix of old and new, Hanoi is a fantastic destination for a short getaway. Just a few hours from Kuala Lumpur, you can explore the historic Old Quarters with its 36 streets, each dedicated to a specific trade. Don’t miss a day trip to the stunning Halong Bay, where you can spend a night on a boutique boat, experiencing the beauty of Vietnam’s landscapes. Hanoi’s blend of culture, food, and history is sure to make your Raya celebrations unforgettable.

Palawan, Philippines

Palawan, known for its pristine beaches and crystal-clear waters, is often named the best island in the world. Whether you head to El Nido for its scenic beaches and lagoons, or explore Puerto Princesa’s Underground River, Palawan offers endless adventure. Enjoy kayaking, scuba diving, and savor the island’s fresh local food. The laid-back atmosphere and stunning surroundings make it an ideal destination for a relaxing holiday.

Week-Long Escapades for 7 Days

If you’re looking to take a bit more time off, these 7-day destinations are perfect for a longer, more immersive Raya vacation.

Busan, South Korea

Busan, South Korea’s vibrant coastal city, offers a mix of urban excitement and natural beauty. Seafood lovers will enjoy the Jagalchi Fish Market, where you can select fresh catches and enjoy them in nearby restaurants. For a scenic experience, visit Beomcheong-dong’s rooftops, which feature stunning views of Busan’s skyline. Explore the city’s beaches and temples, and get a taste of Korean culture through its food and architecture.

Tokyo, Japan

If you’re lucky enough to travel during the cherry blossom season, Tokyo is the place to be. With beautiful parks like Ueno and Yoyogi, you can enjoy the blooms and experience Japan’s iconic cherry blossom festivals. A stroll along the Meguro River offers some of the most picturesque scenes of sakura trees. This trip provides the perfect balance of vibrant city life and peaceful natural beauty, making your Raya celebration one to remember.

Perth, Australia

For a refreshing escape, head to Perth, where Australia’s autumn weather offers the perfect break from the heat. Cruise along the Swan River to Fremantle, visit Rottnest Island for a chance to meet the famous quokkas, and explore the local arts scene. If you’re lucky, you may even catch a glimpse of migrating whales off the coast. Perth’s cool temperatures and scenic surroundings make it a wonderful Raya destination.

Extended Vacations (9 to 14 Days)

For those who want to truly immerse themselves in a destination and extend their Raya celebrations, these longer trips offer both relaxation and adventure.

Germany

Germany in March and April offers beautiful spring weather, perfect for exploring cities like Berlin and Munich. In Berlin, discover the city’s artsy neighborhoods, while Munich offers access to the fairy-tale-like Neuschwanstein Castle and the Bavarian Alps. With fewer tourists in spring, it’s the best time to enjoy Germany’s rich culture, historic landmarks, and outdoor beauty.

Turkey

A trip to Turkey is ideal for those seeking a mix of history, culture, and natural wonders. In Istanbul, visit landmarks like the Hagia Sophia and the Blue Mosque, and explore the city’s vibrant bazaars. For an unforgettable experience, take a hot air balloon ride in Cappadocia, where you’ll witness stunning landscapes as you float above the valleys. Turkey’s unique blend of cultures makes it a fascinating destination for an extended Raya celebration.

Denmark and Sweden

Explore the best of Scandinavia with a trip to Denmark and Sweden. In Denmark, visit Copenhagen’s Tivoli Gardens, the world’s third-oldest theme park, and enjoy the city’s historic charm. In Sweden, explore Stockholm’s Royal Palace and its impressive architecture. A well-planned itinerary will give you a taste of both countries’ natural beauty and rich culture, making it an ideal trip to end your Raya celebrations on a high note.

Conclusion

Whether you have a long weekend or an extended break for Raya, there’s a perfect destination for you. From cultural explorations to relaxing beach getaways, these 10 destinations offer the ideal setting for making the most of your holiday. So, pack your bags and get ready for an unforgettable Raya celebration.

Traveling is about much more than ticking off a list of sights; it’s an opportunity to connect with different cultures and gain new perspectives. Whether you’re exploring ancient ruins, savoring local dishes, or diving into the unknown, each new experience can be enriching. But how can you ensure that your travels are respectful and positive for the communities you visit? Here’s a guide on how to plan a trip that respects and celebrates the cultures you encounter.

Do Your Research

Before heading out on your next adventure, take the time to learn about the culture, customs, and history of the destination you’re visiting. This step is key to ensuring that your actions and behaviors are respectful. Understanding the local lifestyle, traditions, and history will help you avoid accidental offenses and give you a deeper connection to the place.

The more you know about the local community, the richer your travel experience will be, and the better you’ll be at respecting and embracing the culture.

Engage with Local Communities

Immersing yourself in the local culture is one of the best ways to truly experience a destination. Look for opportunities to connect with the people who live there through community tourism, local festivals, or volunteering projects. These interactions can lead to a much more authentic travel experience, where you’ll not only learn but also foster mutual understanding and friendship.

Respect Local Customs

Respecting the local customs and traditions is crucial when traveling responsibly. When you visit a sacred site or participate in a cultural activity, make sure to approach it with reverence and care. Whether you’re visiting a Hindu temple in Bali or dining with a local family in Japan, taking the time to understand and appreciate local customs will allow you to connect on a deeper level. Remember, it’s all about showing respect and engaging thoughtfully with the local culture.

Learn Basic Phrases in the Local Language

You don’t have to be fluent, but learning a few key phrases in the local language can make a big difference. Simple greetings like “hello,” “thank you,” and “please” go a long way in bridging gaps and showing locals that you care about their culture. Your effort to communicate in their language will be appreciated, and it will help you forge stronger connections.

Support Local Businesses

One of the most impactful ways to support a community is by shopping and dining at locally owned businesses. Choose accommodations, restaurants, and shops that are run by local people, as this helps sustain their economy and keeps traditional craftsmanship alive. Supporting artisans, farmers, and local producers ensures that your money goes back into the community, helping preserve their unique culture and traditions.

Minimize Your Environmental Impact

Being a responsible traveler doesn’t stop at cultural respect. It’s also about caring for the environment. Try to minimize your ecological footprint by reducing waste, conserving resources, and following the rules when engaging in outdoor activities. Respect nature by staying on designated trails and by taking care not to damage protected areas or wildlife habitats.

Shop Responsibly

When buying souvenirs, make sure they are ethically sourced. Look for locally made crafts or products that truly reflect the culture of the destination, and avoid items made from endangered species or that exploit local resources. Support fair-trade products that help local artisans and communities thrive while promoting sustainability.

Educate Yourself and Others

Learning about responsible travel and spreading the knowledge can make a big difference. Share your experiences with fellow travelers, friends, and family to encourage a culture of respect and sustainability. When more people are aware of the importance of cultural sensitivity and responsible tourism, the more positive impact we can collectively have on the places we visit.

Practice Cultural Sensitivity

Cultural sensitivity is vital when traveling. There may be moments where you unintentionally offend someone, simply because you’re unaware of a custom or tradition. To avoid these awkward situations, do some research about the cultural norms before your trip. Once you arrive, keep an open mind and be ready to learn. Engaging with local practices, embracing new ideas, and being respectful will not only enhance your experience but will also show the local community that you honor their way of life.

Conclusion

Responsible travel is about more than just being mindful of the environment; it’s about engaging with local cultures in a respectful, appreciative, and ethical manner. By learning about the places you visit, supporting local businesses, and practicing cultural sensitivity, you can have an enriching travel experience while making a positive impact. Travel is about creating meaningful connections, so let’s do our part in ensuring that we respect and celebrate the communities we explore.

Hiking Volcan Acatenango, located near Antigua, Guatemala, was one of the most physically demanding yet rewarding experiences of my life. The struggle was real, but the beauty and the rewards made every step worth it.

Having spent a month in Guatemala, I had heard from numerous travelers that hiking Acatenango was one of the best things they had done in the country. Not wanting to miss out, I booked an overnight hike and embarked on an adventure that will forever be etched in my memory.

Why Hike Volcan Acatenango?

The hike to Volcan Acatenango is an extraordinary challenge, but it offers some of the most incredible views and experiences. From the rugged terrain to the sight of Volcan Fuego erupting against the night sky, this trek delivers a true adventure. If you’re in Guatemala and up for a challenge, this hike is absolutely worth it.

Is It Possible to Hike Acatenango Without a Tour?

Technically, you can hike Volcan Acatenango independently during the day, but I wouldn’t recommend it. The terrain is tough, with steep inclines and unpredictable weather. A guided tour ensures your safety, provides necessary equipment, and allows you to enjoy the experience fully. Plus, watching Volcan Fuego’s eruptions from the comfort of a camp is an unforgettable experience, and a guided tour ensures you don’t miss out on this.

A guided tour typically includes:

  • Pre-set campsite
  • Cooked meals (dinner and breakfast)
  • Sleeping bags and pillows
  • Warm clothing for the cold summit morning
  • Walking sticks for the descent
  • An experienced guide who knows the trail and the mountain

I highly recommend booking a tour to make the most out of this adventure.

Choosing the Right Tour Company

For a hike this challenging, it’s worth opting for a well-reviewed tour company. I initially booked with Balam Tours, but they no longer operate as of 2024. For future travelers, I suggest checking out options on Get Your Guide, where you can find tours with high ratings. Prices are typically around $90 USD for an overnight tour, including all essential gear and an expert guide.

How Difficult is the Acatenango Hike?

Let me be clear – hiking Volcan Acatenango is tough. The trail is steep, rocky, and the altitude is intense, so it’s not for the faint of heart. The hike to the campsite starts at 1,400 meters and goes up to 3,300 meters over a 10-km stretch. Expect to push your body to the limit, especially if you’re not used to high-altitude hikes.

The terrain is uneven, with loose gravel and rocks, which can make each step tricky. To add to the challenge, the pace of my tour group was fast – everyone was fitter and faster than me. But luckily, our guide Miguel kept the group together and always cheered me on. His positive energy made the tough moments more bearable.

The Journey Up

Despite my lack of preparation, I kept going, fueled by the changing landscapes around me. The hike traverses three distinct ecosystems:

  • Oak Forest: A lush, vibrant area filled with flowers and corn fields.
  • Cloud Forest: A humid, dense jungle with vines and rich green foliage.
  • Sub-Alpine Forest: The final stretch, which is drier with pine trees and cooler temperatures.

The climb took us about 3 hours and 45 minutes, which was faster than most groups. By the time we reached the campsite, I was exhausted but incredibly proud. The views throughout the hike were mesmerizing, and the changing environments kept me distracted from my tired muscles.

Camping at Volcan Acatenango

Camping on the slopes of Volcan Acatenango is surreal. After a cold and tiring ascent, we set up camp and gathered around the fire. Miguel served us a hearty dinner, followed by a cup of hot chocolate and roasted marshmallows.

As night fell, we eagerly waited for Volcan Fuego to erupt. From our campsite, we had the perfect view of Fuego’s constant activity. The volcano emitted powerful eruptions, sending black smoke and glowing lava high into the sky. The combination of the volcano’s eruptions, lightning strikes, and rumbling thunder made for a dramatic and unforgettable evening.

The Sunrise Hike to the Summit

At 3:50 AM, Miguel woke us up for the final stretch – the sunrise hike to the summit. I wasn’t sure if I could do it, but the excitement of seeing the sunrise over the volcanoes kept me going. The first 45 minutes were pure struggle, as we hiked in the freezing dark, with altitude and slippery gravel making every step feel harder. My chest tightened, and my headlamp kept slipping off my face.

But when we finally reached the summit, everything changed. The sunrise over the three volcanoes surrounding Antigua – Acatenango, Fuego, and Agua – was indescribable. Watching Fuego erupt in the early morning light was worth every ounce of effort.

What to Pack for the Hike

While guided tours provide most of the essentials, here’s a checklist of what you’ll need for the hike:

  • Good hiking boots: Essential for the rocky terrain.
  • Comfortable clothing: Dress in layers to prepare for varying temperatures.
  • Swimwear: To enjoy a refreshing dip at the Grotto Waterfall.
  • Towel: A microfiber towel is light and quick-drying.
  • Water: At least 1-2 liters for hydration.
  • Snacks: For a little extra energy along the way.
  • Camera: You’ll want to capture the stunning scenery.
  • Sun protection: Sunscreen, hat, and sunglasses for the exposed sections.
  • Travel insurance: Always a good idea to have coverage for such adventurous trips.

Conclusion

Hiking Volcan Acatenango is a challenging but incredibly rewarding experience. From the tough ascent to the stunning sunrise, every part of the hike is unforgettable. The chance to witness Volcan Fuego’s eruptions in person, camp on the slopes of a towering volcano, and push your physical limits makes this hike a must-do in Guatemala.

If you’re looking for adventure, breathtaking views, and a sense of accomplishment, hiking Volcan Acatenango should be at the top of your list.

Meditation is widely recognized for its ability to help alleviate stress, center the mind, and nurture inner peace. It’s no surprise that this practice has become increasingly popular around the world, embraced by people from all walks of life. In Asia, there are numerous retreats dedicated to helping participants disconnect from the stresses of daily life, providing serene environments for self-reflection and relaxation. If you’re seeking a peaceful escape to nurture your mind and soul, here are four of the top meditation retreats in Asia to consider.

1. Plum Village, Thailand

Plum Village, founded by the influential Zen Master Thich Nhat Hanh, offers transformative mindfulness and meditation retreats in the tranquil Thai countryside, just an hour and a half from Bangkok. The retreat focuses on “engaged Buddhism,” integrating mindfulness practices with social and environmental activism. Participants are invited to explore the peaceful practices of walking meditation, mindful eating, and Dharma talks, while also engaging in humanitarian and ecological projects.

During a typical retreat at Plum Village, guests start their days early with meditation sessions and other reflective practices. There is also ample time for personal relaxation, reflection, and community connection with both fellow retreat-goers and the resident monks.

2. Bali Silent Retreat, Indonesia

Nestled amidst the lush rice terraces of Tabanan, Bali, the Bali Silent Retreat is an off-the-grid sanctuary designed to help individuals reconnect with themselves. What sets this retreat apart is its flexible schedule, allowing guests to design their own experience while adhering to the core principle of “doing nothing.” The retreat is located near the sacred Batu Karu mountain and offers a truly immersive experience in silence and mindfulness.

Guests can engage in mindfulness meditation, yoga, Balinese cultural discussions, and sustainability lessons, all while detoxing from technology and the outside world. If you prefer, you can also explore the option of a day pass, which grants access to organic meals, daily programs, and activities. The retreat promotes a peaceful, reflective environment, making it perfect for those seeking tranquility and inner balance.

3. Vipassana International Academy, India

For those looking to deepen their meditation practice, the Vipassana International Academy in Igatpuri, Maharashtra, offers a rigorous 10-day Vipassana meditation course. Vipassana, meaning “to see things as they truly are,” is one of the oldest meditation techniques in India, focusing on the connection between the mind and body through mindfulness of physical sensations. This intensive course is suitable for meditators of all levels and is held in complete silence to enhance concentration.

The daily schedule involves 7-8 hours of meditation, both seated and walking, as well as periods of reflection. The retreat is donation-based, allowing participants to pay what they can afford based on the value they’ve received from the experience. Accommodation is simple, and meals are vegetarian. The course is an immersive way to reset your practice and gain deeper insight into your mind and body.

4. Bliss Sanctuary for Women, Bali

Bliss Sanctuary for Women in Bali offers a unique blend of wellness and meditation designed specifically for women. With several retreats located in the popular Seminyak and Canggu areas, Bliss Sanctuary provides a luxurious yet intimate atmosphere for women seeking relaxation and self-care. The sanctuary focuses on holistic well-being, offering personalized meditation sessions, yoga, and spa treatments.

Whether you’re a beginner or an experienced meditator, Bliss Sanctuary tailors the experience to your personal needs. You can enjoy one-on-one meditation and yoga sessions with dedicated instructors or explore a variety of activities, from detox programs to cultural experiences. It’s an ideal choice for women looking for a rejuvenating escape while practicing mindfulness in a serene and supportive environment.

Preparing for Your Meditation Retreat

Attending a meditation retreat is a transformative journey, and being prepared will enhance the experience. Some essential tips for your retreat include bringing comfortable clothing, a meditation cushion, and an open mind. Embrace the silence—while it may initially feel challenging, it is an essential part of the meditation process. Don’t be too hard on yourself; remember, the purpose is to observe your thoughts and emotions without judgment.

Meditation retreats provide a peaceful environment to disconnect, center yourself, and find clarity. Whether you’re new to meditation or seeking to deepen your practice, these retreats offer the perfect setting to cultivate inner peace. Take the time to recharge and embrace the tranquility that these serene destinations offer, and come away with a renewed sense of balance and mindfulness.

Exploring local food is one of the best parts of traveling, and in Argentina, I’ve found that no dish is as irresistible as the empanada. If you’re a foodie like me, you know the thrill of hunting for the best local eats. While it’s easy to fall into the trap of touristy spots, nothing beats finding a hidden gem that serves authentic, delicious food. After spending some time in Argentina, I can confidently say that the empanada is a must-try.

The Empanada Capital: Salta’s Famous Tournament

If you’re serious about finding the best empanadas, head to the north of Argentina, specifically to Salta. This region is well-known for its empanada tournament, held every September, where over 70 vendors compete for the title of best empanada maker. I had the good fortune to be in Salta during the tournament, and let me tell you—it was an experience like no other. The festival is a celebration of all things empanada, and walking through the stands, sampling different fillings, was an absolute treat.

What Exactly is an Empanada?

At its core, an empanada is a dough-filled pocket, traditionally stuffed with various savory fillings. The basic concept is simple, but the variety of fillings is what makes empanadas so exciting. From ground beef to chicken, cheese, and even corn, you can find just about anything inside that doughy shell.

Here are some popular empanada varieties you’ll find around Argentina:

  • Carne: The classic empanada, filled with ground beef, usually spiced with either a mild or spicy sauce. You’ll find these at just about any empanada spot.
  • Pollo: These empanadas feature chicken mixed with onions, potatoes, or other vegetables. A comforting choice for chicken lovers.
  • Carne Cortados a Cuchillo: A more premium option, this empanada features finely chopped meat, giving it a juicier and more tender texture compared to the standard ground beef.
  • Matambre: This variety uses the outside ribs of a cow, adding a rich and unique flavor to the filling.
  • Charqui de los Valles Calchaquies: Empanadas made with dried meat, often offering a more intense and savory taste.
  • Gallina Casera: These empanadas are made with organic, free-range chicken, offering a more natural and premium option compared to the regular chicken variety.
  • Empanadas de Choclo: Known as humita, these are a vegetarian option made with corn, making them a great alternative to the meat options.
  • Árabes: A Middle Eastern-inspired empanada with a filling made from beef, vegetables, and lemon juice, wrapped up in dough.
  • Mondongo: These empanadas are filled with the neck of a cow, making them incredibly tender and juicy.

Other Delicious Dishes to Try

While empanadas may steal the show, there are plenty of other mouthwatering dishes you’ll find at empanada spots and local restaurants in Argentina. If you find yourself craving something hearty, try Tomales, a dish where beef and corn are wrapped in corn dough. Another favorite is Locro, a thick, hearty stew made with pork and beef, popular across South America.

Why Empanadas Are Worth the Hype

Empanadas in Argentina are more than just a snack—they are an integral part of the food culture, and each region adds its own spin to this beloved dish. Whether you’re grabbing one for a quick lunch or sitting down to enjoy a variety of different kinds, empanadas offer a taste of Argentina’s rich culinary heritage. Whether you’re in the north of Argentina during the famous tournament or just exploring local markets, trying empanadas is a culinary adventure you can’t miss.

As an outdoor enthusiast, your gear collection tends to grow over time. From hiking essentials to more niche equipment, everything finds its place—though often in cluttered piles or scattered storage. If you’re like me, you’ve probably found your gear everywhere: stacked in the corner of your room, piled in bins, or shoved into random spaces in the garage. After years of living with disorganization, I decided it was time to make a change. Enter the “gear wall.”

Building a gear wall has been a game-changer in terms of organizing my collection. Even with limited space—just a wall in my bedroom and a little room in the garage—I’ve managed to create a functional and aesthetically pleasing storage solution that not only keeps my gear in place but also makes it easy to grab what I need.

Step 1: Getting Started

The first step in creating your dream gear wall is figuring out the space you have. For me, it was a bit of trial and error, but with a little help from my mom (who has a keen eye for design), I identified a small section of my bedroom wall that would work perfectly.

Next, you’ll want to set a budget. I opted for a minimal labor solution, choosing something that didn’t require much construction work. If you want to skip the hard labor like I did, a great option is to invest in ready-made systems like ELFA Closet Solutions from The Container Store. They offer everything from shelves to hooks that can help you create a neat, efficient setup.

Before diving into buying and assembling, it’s important to evaluate your gear. Sorting everything into categories (sleeping gear, electronics, cooking equipment, etc.) will give you a better understanding of how much space you’ll need for each type of gear.

Step 2: Plan Your Wall Layout

When I started looking at organizing options, I quickly realized that the best solution for me was to divide the space into two 2-foot sections. This size worked well with the modular options from ELFA, such as hanging bars, drawers, and shelves. As I began assembling the wall, it became clear that this project would take some trial and error. I made multiple orders to get it right—sometimes the original plan didn’t work out, and other times, I found even better solutions as I went along.

Aesthetics were important to me as well. My bedroom is my sanctuary, so the gear wall had to be both functional and visually pleasing. I wanted it to be a stylish display of all my gear that could double as art—let’s face it, a Pinterest-worthy wall was my goal.

Step 3: Organizing Your Gear

With the wall space and components selected, it was time to get creative with how to organize my gear.

Backpacks: I have an absurd number of backpacks—running packs, day packs, fanny packs, travel packs, and backpacking packs. Initially, I thought about using a pegboard for hanging them, but the price was steep, and it didn’t seem the best use of space. Instead, I installed two hanging bars and used kitchen S-hooks to hang the backpacks. This allowed me to hang multiple packs on each rod (and my climbing helmet too), which saved space while keeping them organized and visible.

Sleeping Bags & Quilts: Proper storage for sleeping bags is important, as compressing them for too long can damage the insulation. I wanted to store them with plenty of space to maintain their loft, so I placed them on the top shelf. This setup works great for my two sleeping bags, and if I add another in the future, I’ll still have space.

Trekking Poles & Umbrella: Trekking poles are tricky because they’re long and thin, and don’t fit well in regular storage bins. After searching for the right solution, I found shelf bracket hooks from The Container Store. These work perfectly for hanging my trekking poles and umbrella on the side of the wall, keeping them out of the way but still easily accessible.

Electronics: Since I use rechargeable electronics for both outdoor adventures and daily life, I needed a designated spot for charging gear like my headlamp and battery bricks. I added a small shelf for a multi-USB charging station, which also doubles as a space for maps and books, offering a convenient “landing zone” for all my pre-trip prep.

Guidebooks & Maps: This was a last-minute addition to my gear wall. I realized that in order to make the wall work, I had to clear out some of my storage cubbies that were filled with old textbooks and childhood books. I integrated a bookshelf into my gear wall, thanks to the ELFA system, and now my outdoor guidebooks and NatGeo maps have their own place. The maps fit perfectly into tall boxes that clip into the pegboard system, keeping them organized and easy to access.

Step 4: Fine-Tuning and Maintenance

Once everything was in place, I spent some time fine-tuning the organization. I continually adjust as my gear collection evolves or as I realize more efficient ways to organize everything. The key to maintaining your gear wall is being proactive about keeping it neat—especially if you tend to add new gear frequently.

One of the benefits of a gear wall is that everything is visible, so I’m no longer digging through bins to find what I need. It also gives me the freedom to easily swap out gear when I head out on different adventures, and the wall itself becomes an inspiring part of my bedroom decor.

Conclusion

Building a gear wall might seem like a big task, but once you start, it’s incredibly rewarding. Not only does it help keep your gear organized, but it also allows you to showcase the pieces you love. It’s a functional storage solution that adds a touch of creativity to your space. If you have a small area available, take the plunge and build your own gear wall—you won’t regret it!

Located within the stunning Royal National Park, just outside of Sydney, the Figure Eight Pools are one of the most unique and sought-after natural attractions in New South Wales. With their perfectly symmetrical shape and crystal-clear waters, they make for an Instagram-worthy adventure. However, while these pools are a beautiful destination, they come with a certain level of risk. It’s important to approach this hike with the right preparation and awareness. Here are eight tips to help you make the most of your visit to the Figure Eight Pools.

1. Check the Tide, Weather, and Swell Before You Go

This is perhaps the most crucial tip. The Figure Eight Pools are located on a rock shelf that is directly exposed to the ocean, making it necessary to visit during low tide. At high tide, the pools will be covered by water, and the surrounding rocks can become dangerously slippery due to crashing waves. It’s essential to check the weather forecast, tide times, and ocean swell conditions before heading out to ensure a safe visit. Low tide with calm seas is ideal.

2. Drive Your Own Car or Rent One

The Figure Eight Pools aren’t accessible by public transportation, so the best option is to drive yourself. You can park at the Garrawarra Farm Car Park and hike to the pools from there. If you don’t have a car, consider renting one. It’s an affordable choice that will give you more flexibility and allow you to explore more of the surrounding areas.

3. Dress for Comfort and Pack a Bathing Suit

The hike to the Figure Eight Pools is approximately 6 kilometers each way, so you’ll need to wear comfortable clothing and footwear. Athletic wear is ideal, and I recommend wearing a swimsuit underneath so you’re ready for a swim once you reach the pools. For shoes, sturdy sneakers will do, though you may want to bring flip-flops or go barefoot while walking on the beach portion of the hike.

4. Be Careful on the Rocks

When you reach the rock shelf, you’ll need to climb over some large, uneven rocks before you reach the pools. The rocks can be slippery, especially as the tide changes, so proceed with caution. It’s easy to get distracted by the beauty of the place, but walking slowly and carefully will help prevent any accidents.

5. Bring Enough Water and Snacks

This hike can take around 2 hours each way, with some time to relax at the pools. Be sure to pack plenty of water to stay hydrated throughout the hike. Snacks are also important to keep your energy up. A comfortable backpack is ideal for carrying your essentials, as it allows your hands to stay free for balancing while you climb over rocks.

6. Arrive Early to Avoid Crowds

To fully enjoy the Figure Eight Pools without the crowds, aim to visit early in the morning. If you time it right, you can have the entire place to yourself! On our visit, we arrived around 9 a.m., and the conditions were perfect—low tide, no crowds, and a peaceful atmosphere. If you plan to visit later in the day, make sure you leave enough time to hike back before it gets dark, as there are no lights along the trail.

7. The Pools May Appear Smaller Than Expected

While the Figure Eight Pools look magnificent in photos, they might seem smaller in person. The rock shelf is dotted with other tidal pools, so it’s easy to get confused about which one is the famous “Figure Eight” pool. After checking several other pools, we realized the 8-shaped one was smaller than expected, but still stunning. The size didn’t detract from the experience—swimming in the pools was incredible!

8. Don’t Forget Your Camera

While the pools might not be as large as they seem in photos, they are still a remarkable sight. The surrounding scenery, the rock formations, and the crystal-clear water make it a perfect place to capture the beauty of nature. Don’t forget to bring your camera or smartphone to document this unforgettable adventure.

Conclusion

A visit to the Figure Eight Pools is a rewarding experience, but it requires careful planning. By checking the tides, dressing appropriately, and being cautious on the rocks, you can enjoy this beautiful spot safely. Whether you’re there to swim, take photos, or simply admire the surroundings, the Figure Eight Pools offer an unforgettable adventure within the Royal National Park.